Add a
Custom Search Bar With Categorised Results
Enterprise and professional users can customise
their own address search bar. This feature is very powerful allowing users to
design custom searches that can be applied to different maps. The search
support result categorisation allows for easy handling of thousands of results.
Time to complete: 15 mins
Contents
1. Getting started
2. Creating your custom search
2.1. Search name
2.2. Schema
2.3. Table
2.4. Columns to search
2.5. Columns to return
2.6. Order results by
2.7. Categorize results by
2.8. Geometry
2.9. Your completed form
3. Adding your custom search to your
map
3.1. Configure search address provider
3.2. Complete custom search set-up
1. Getting started
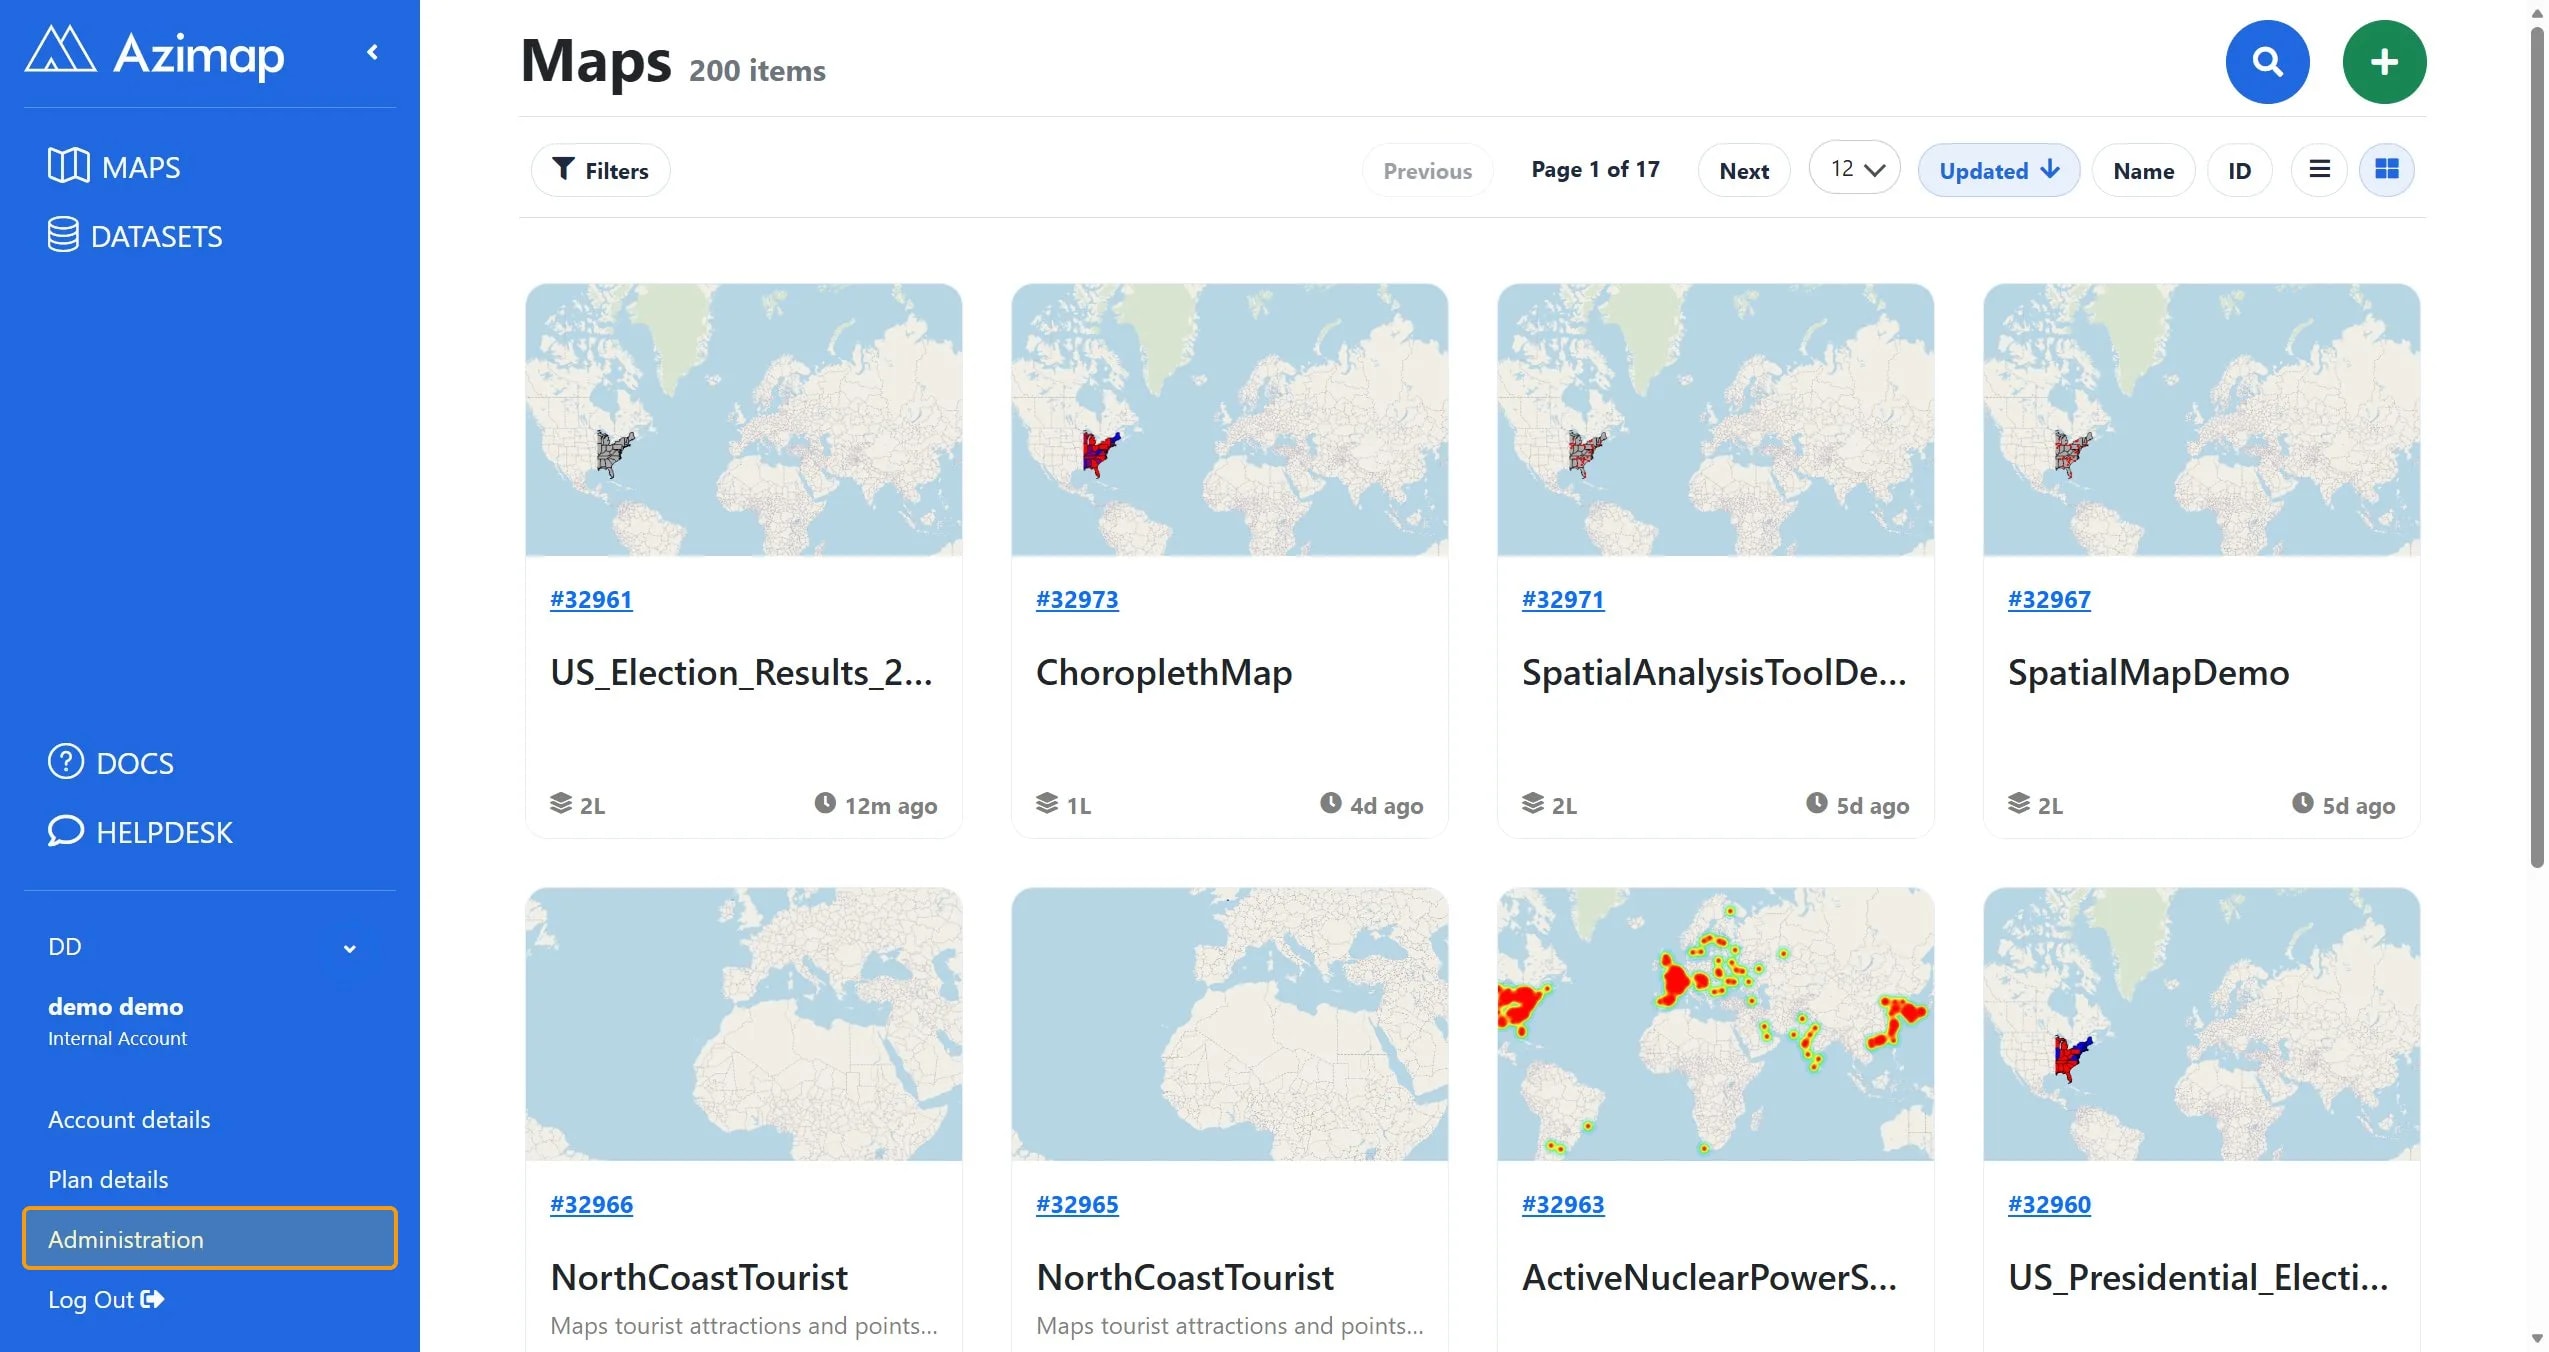
Navigate to the Administration section of
the site which can be found on the bottom left hand side and choose Search Management.
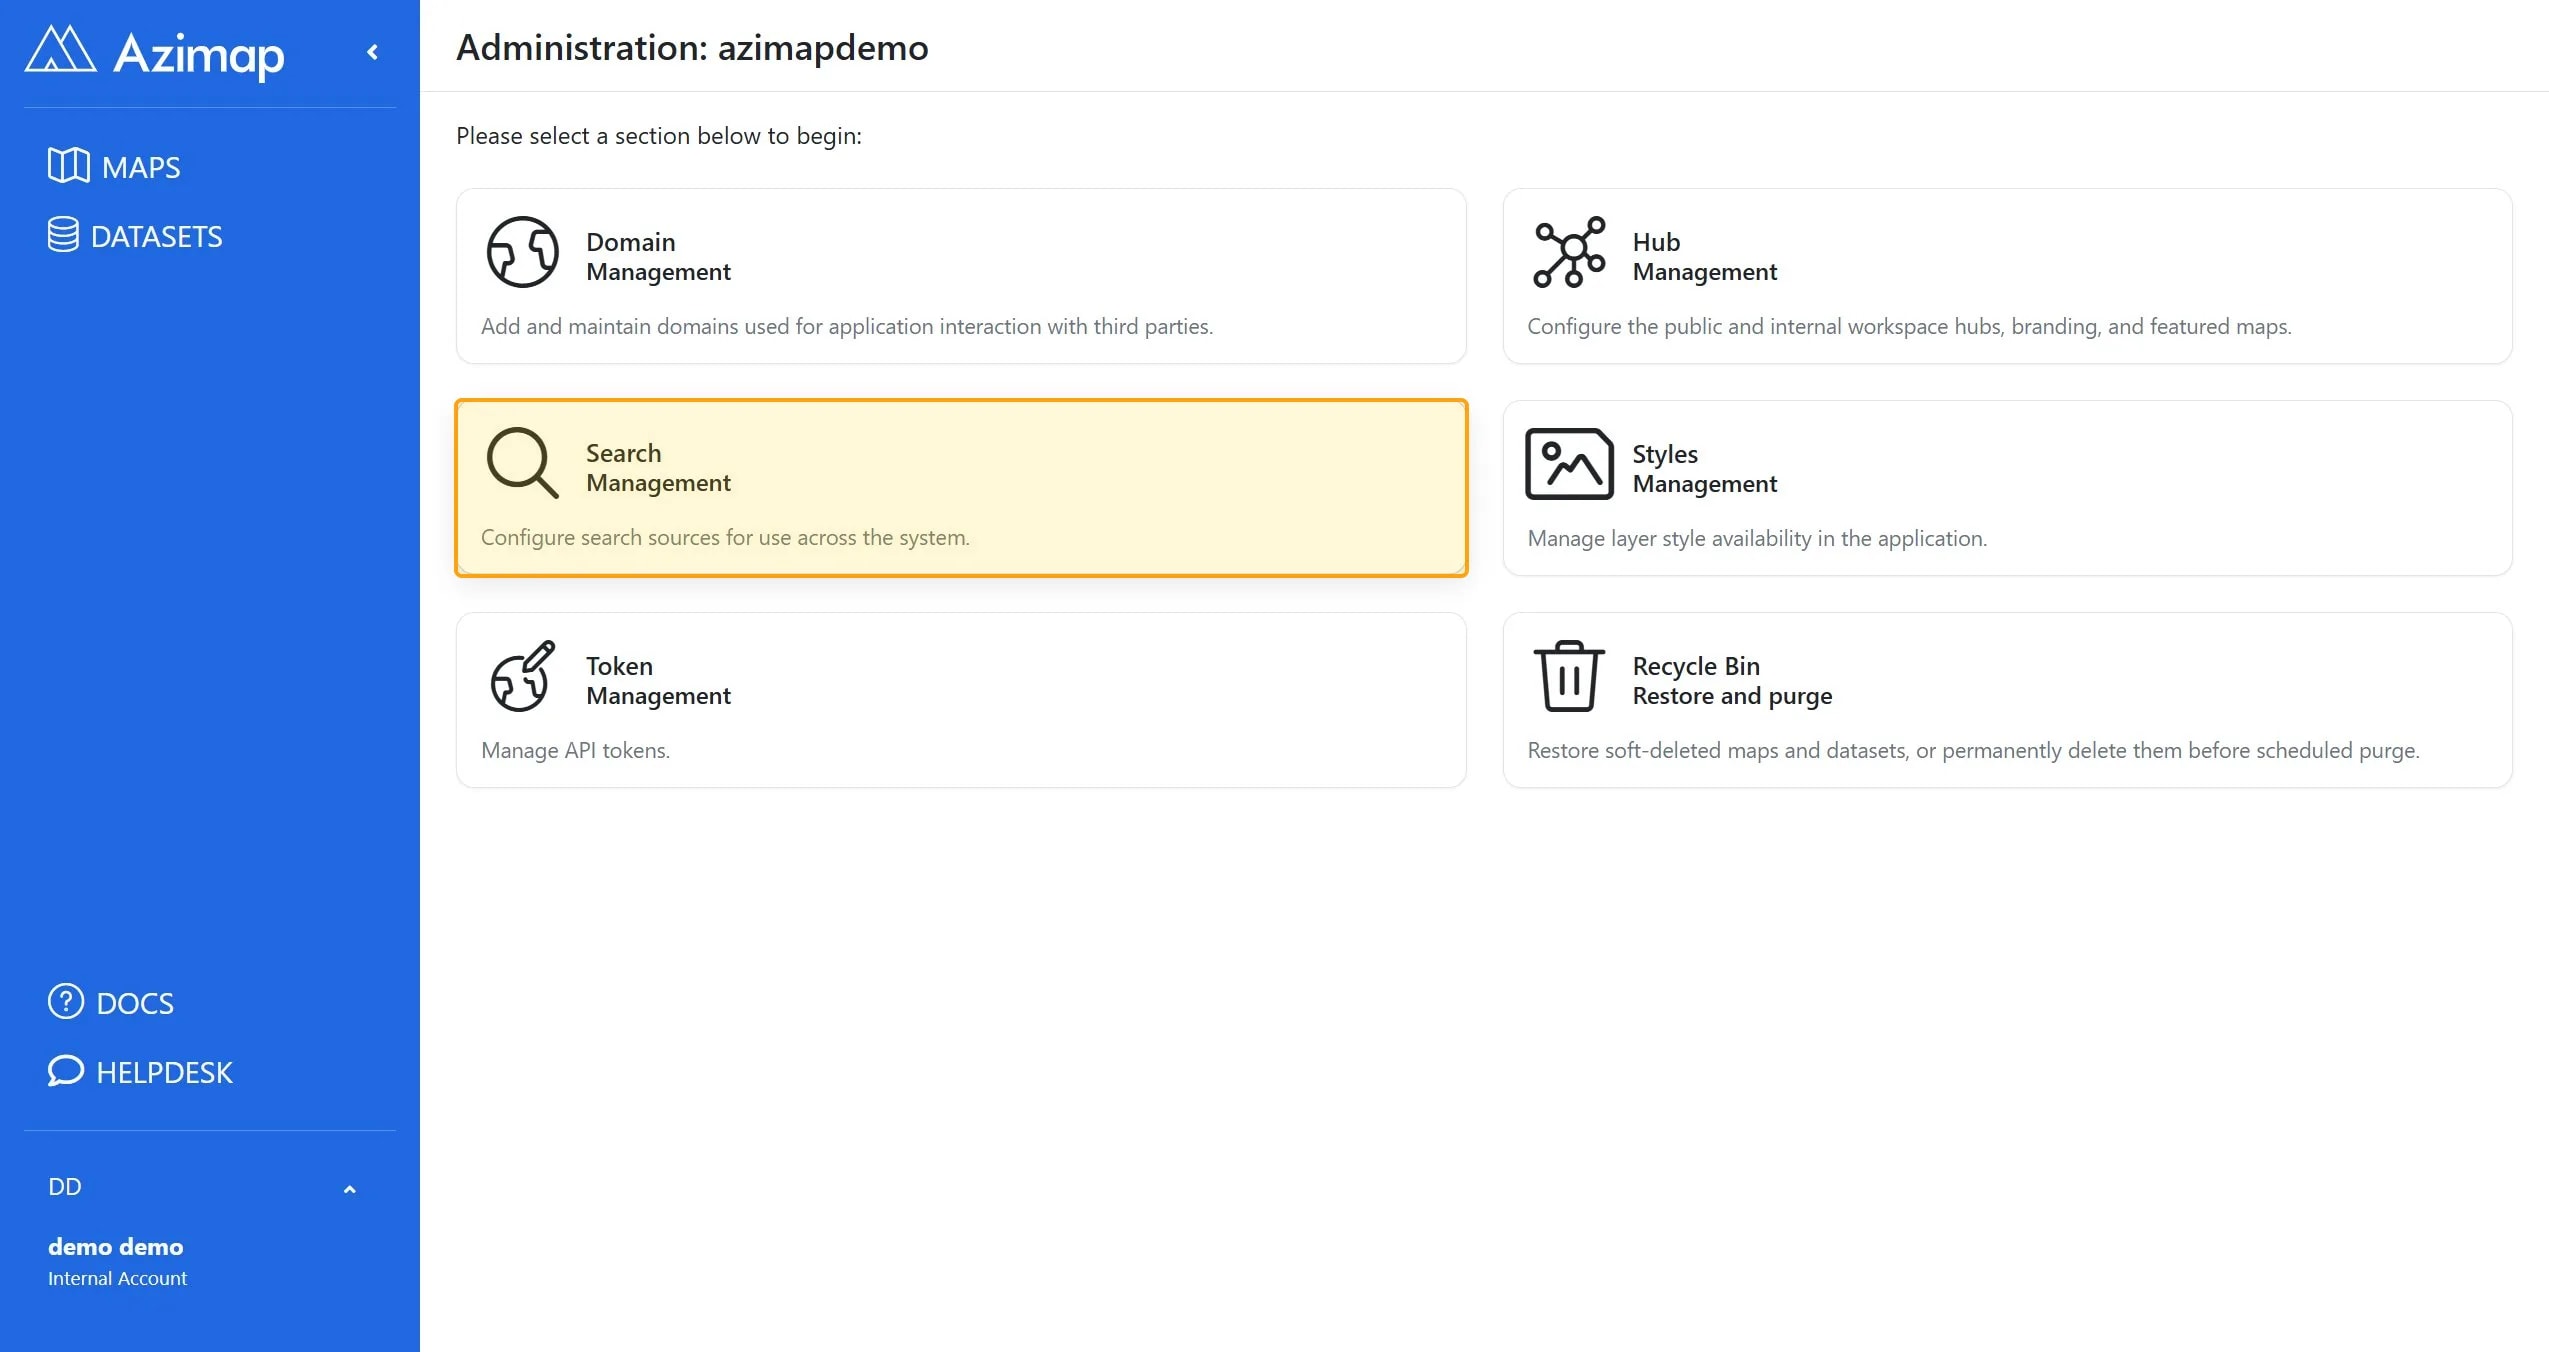
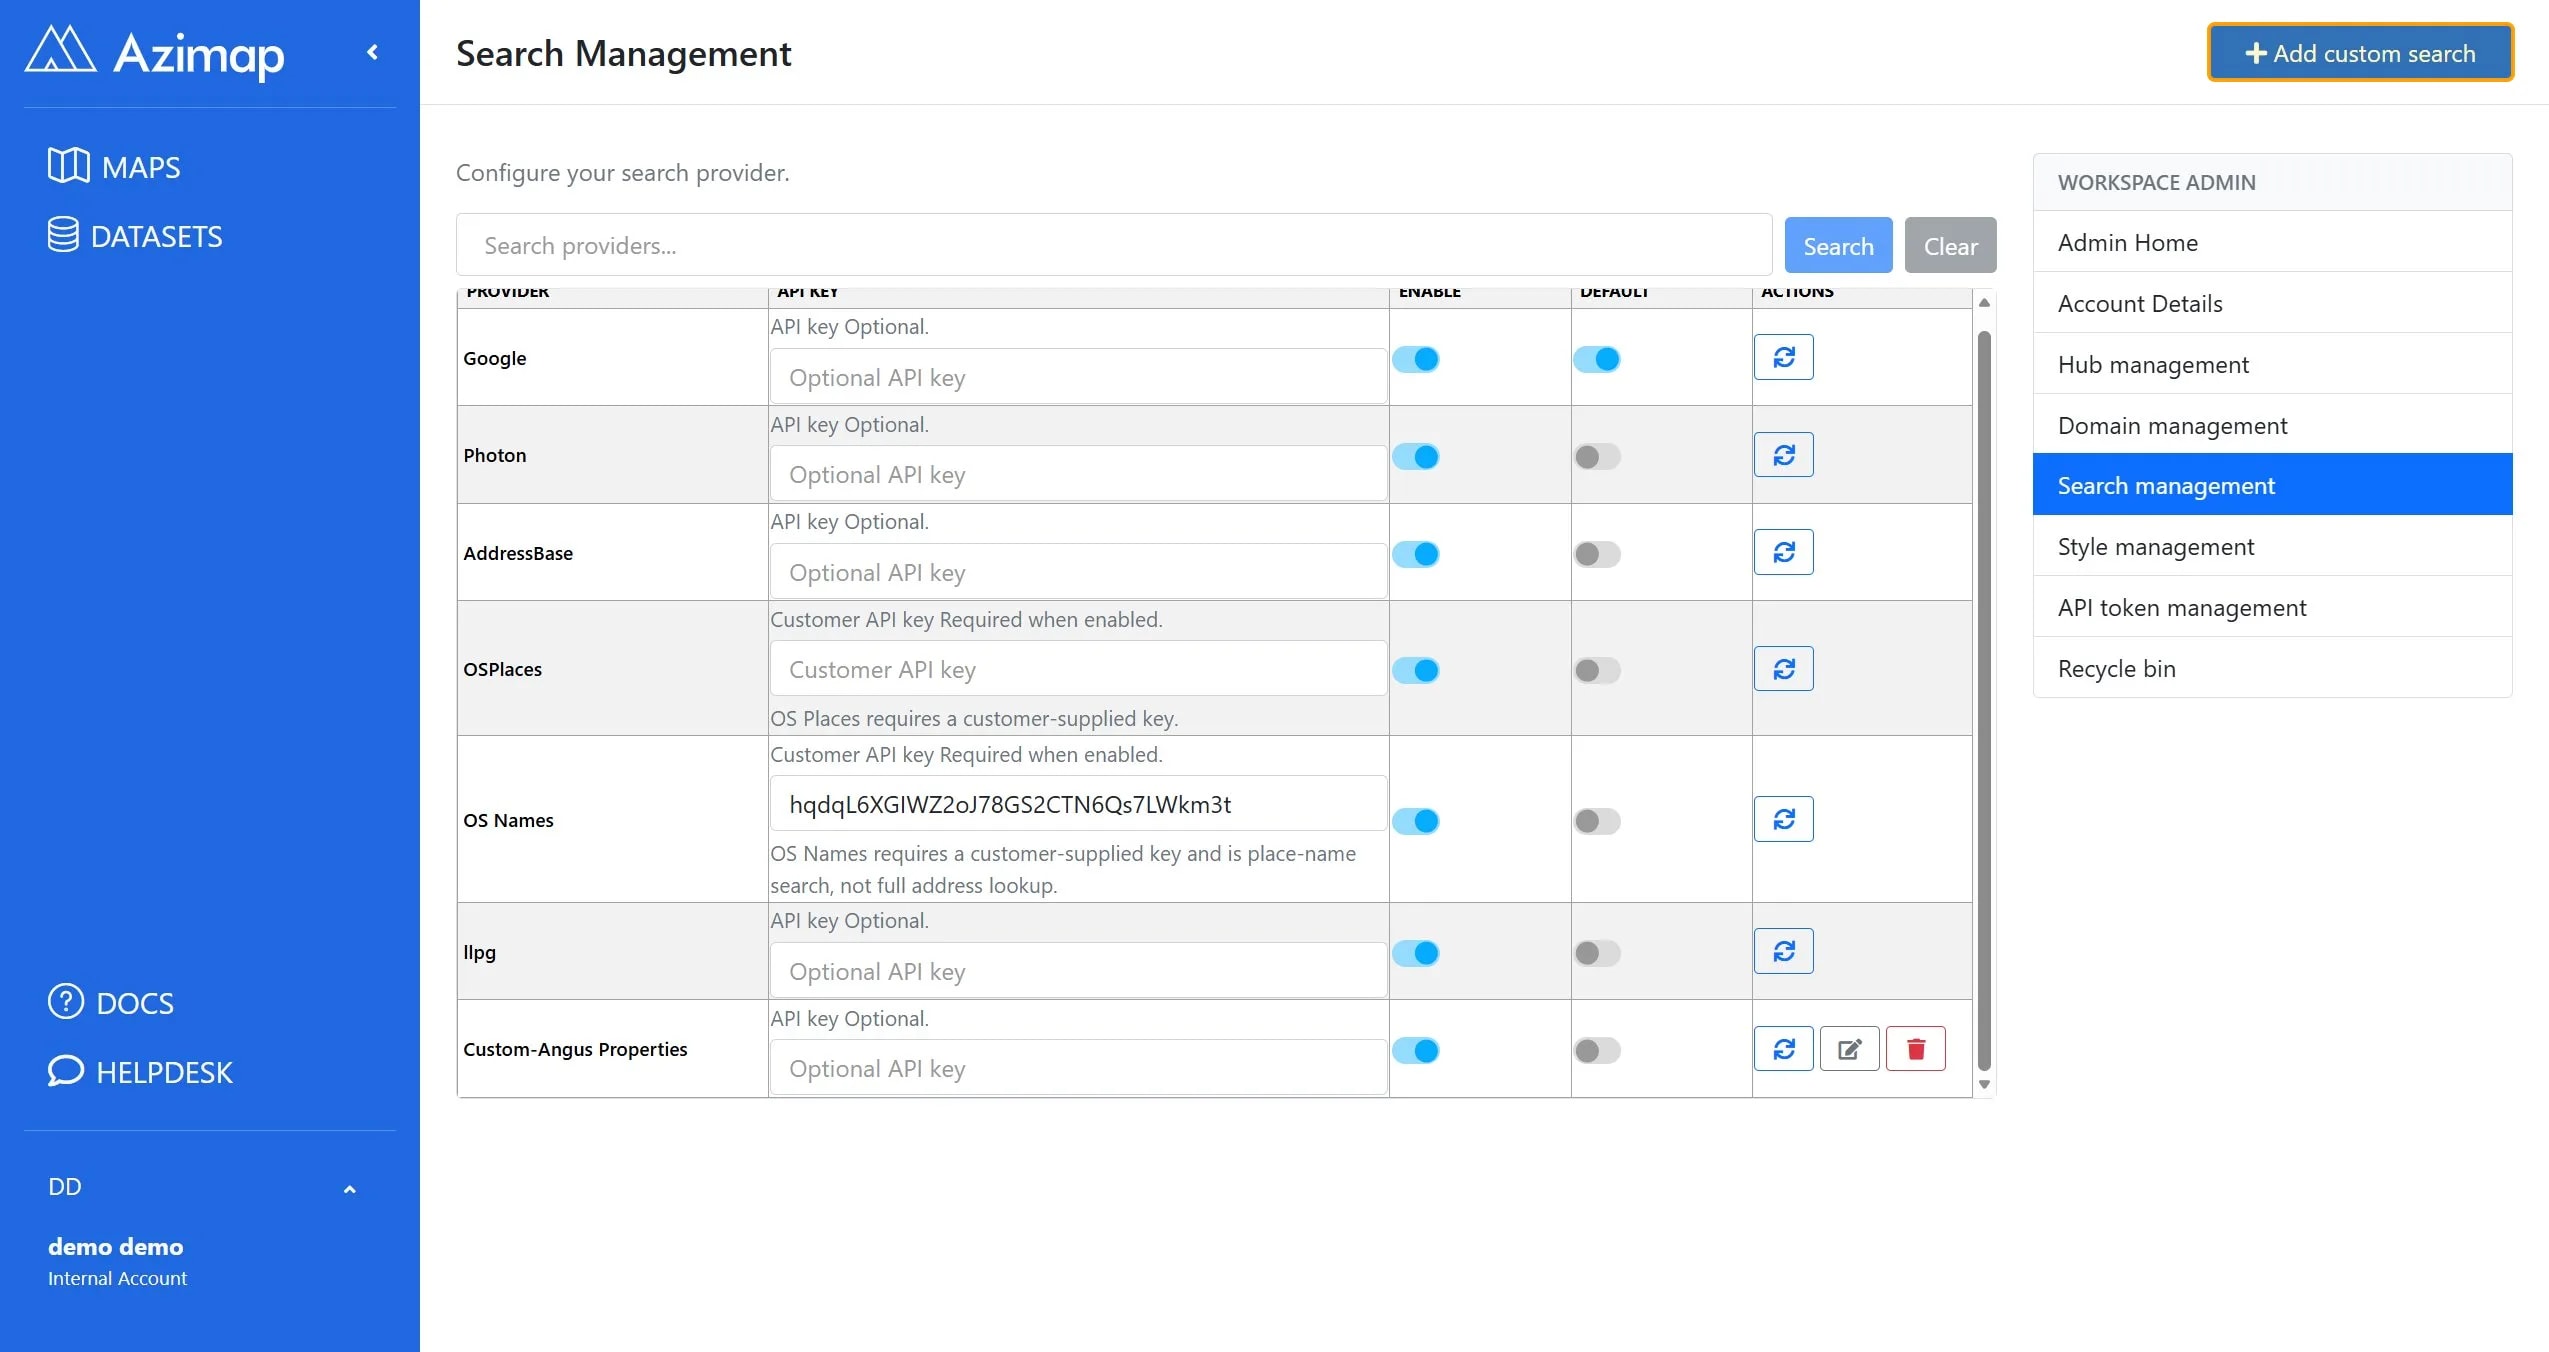
You will be presented with the
available address searches on your account. Click the Add custom search button which is located at the top right hand side of the window.
2. Creating your custom search
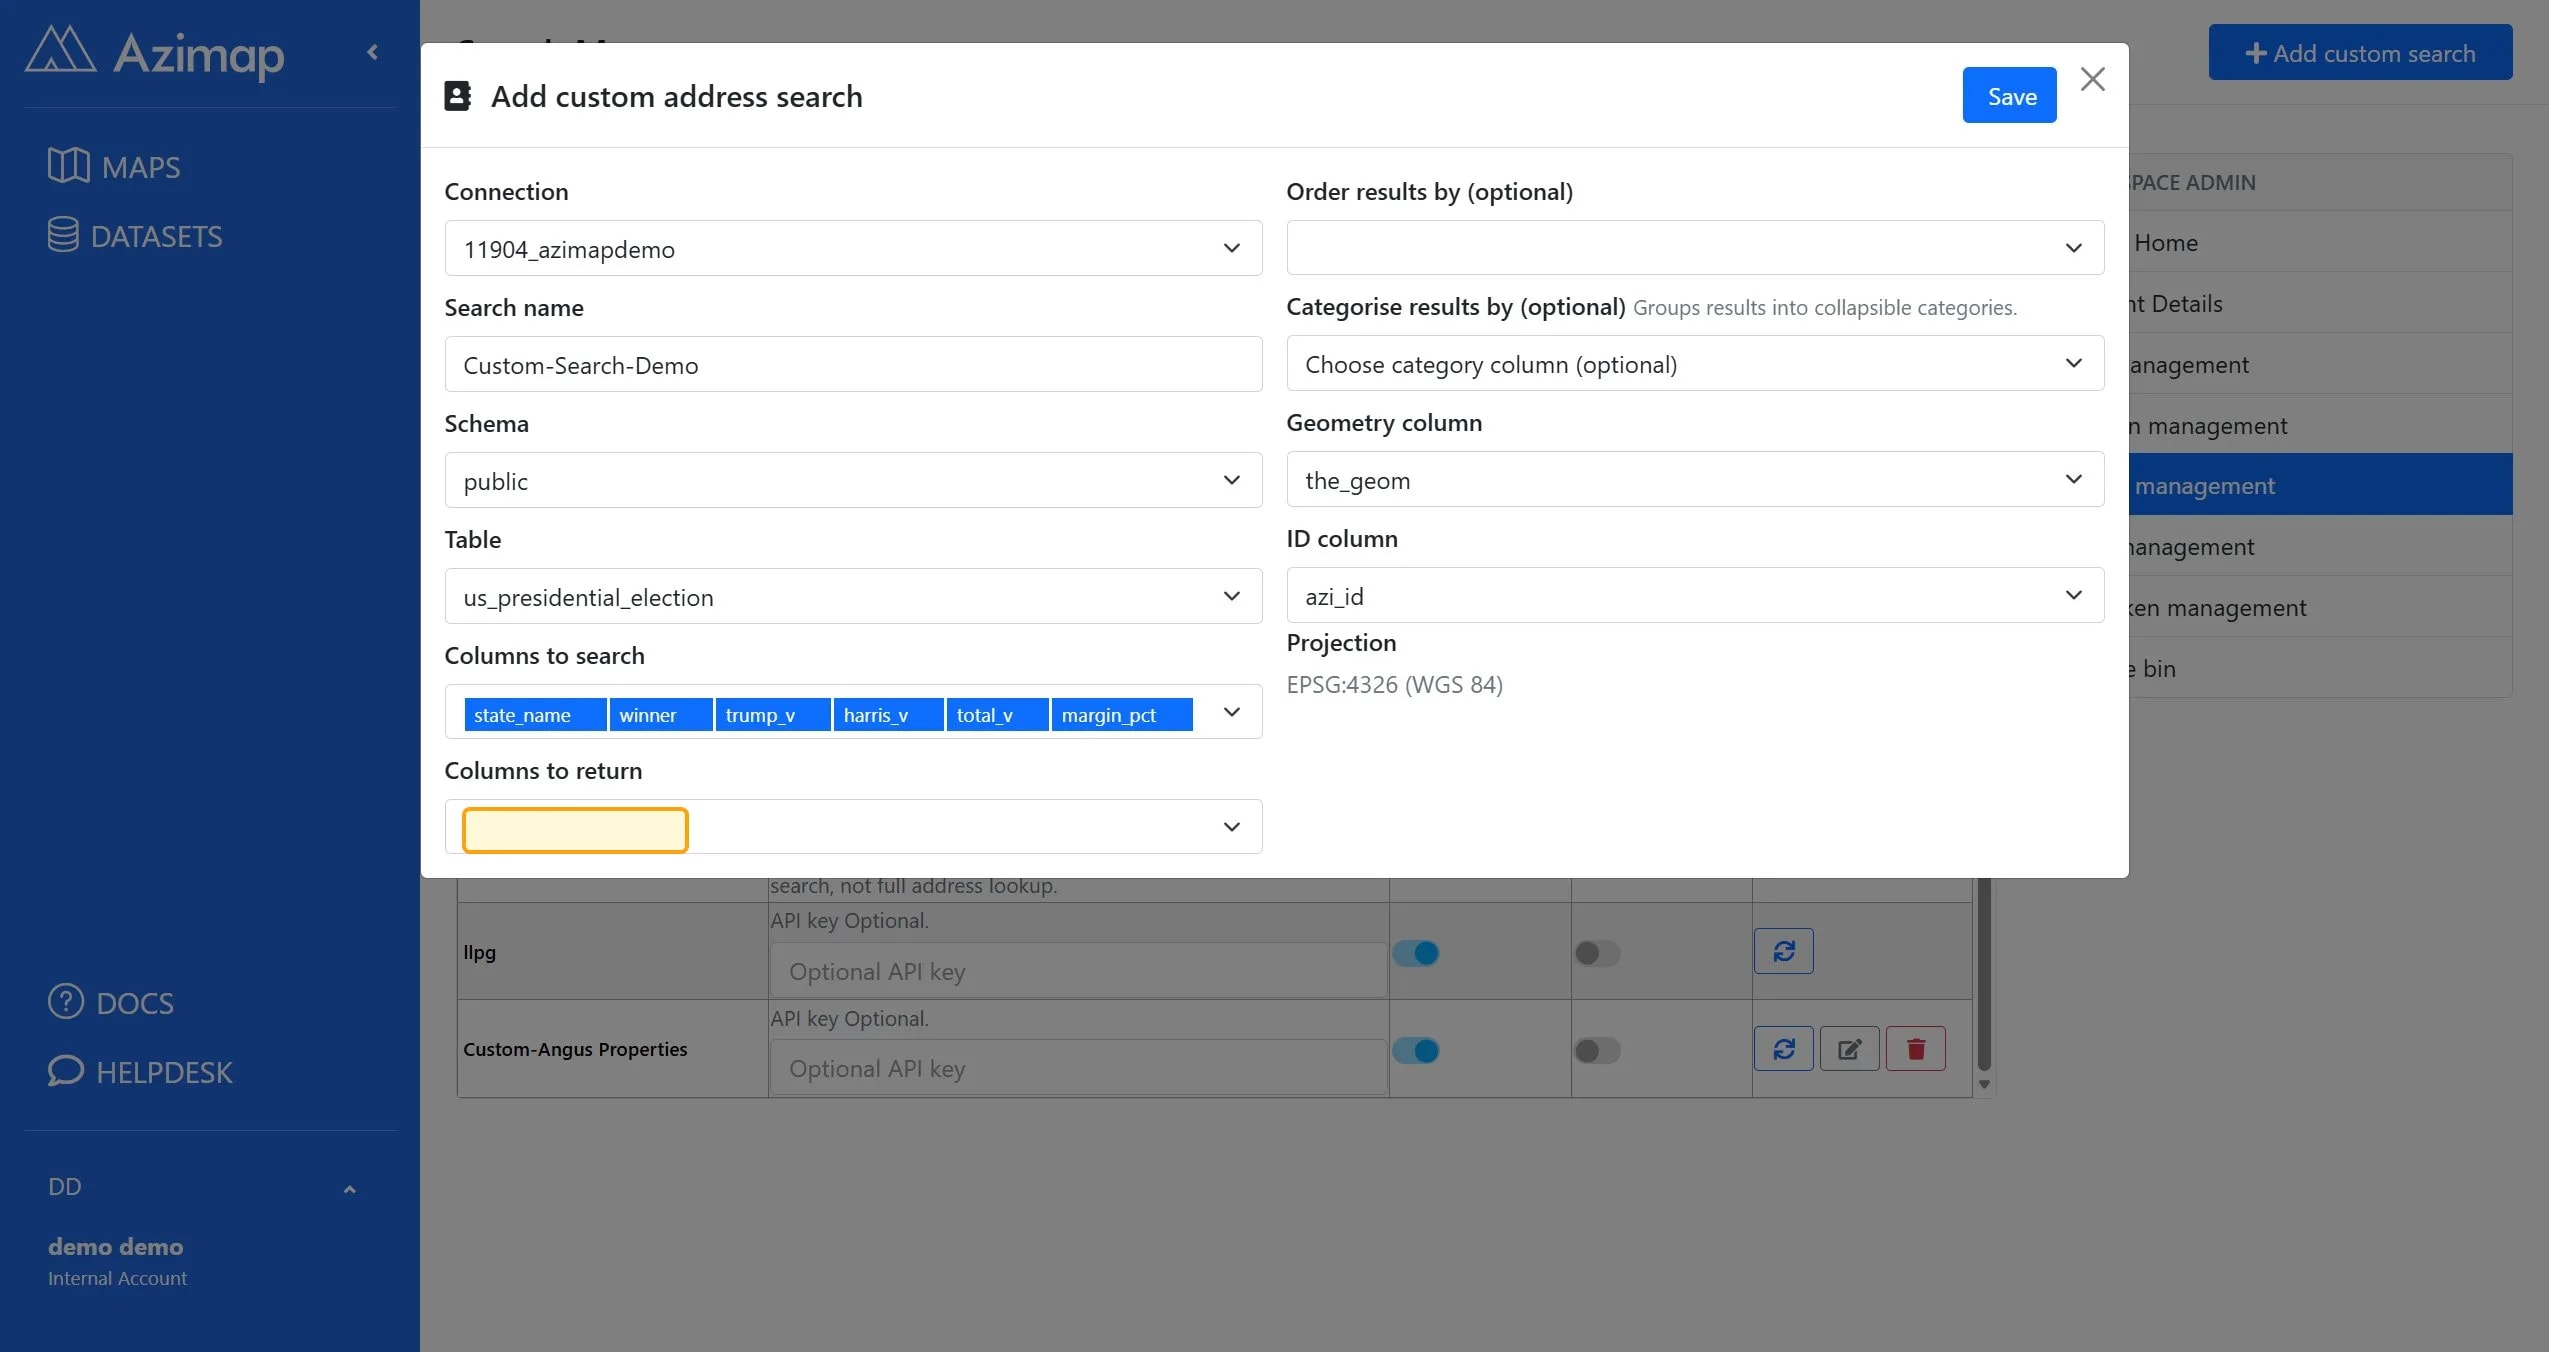
This will open a form allowing you
to define your custom search. You must choose an existing database connection.
This can be created in the external data tool, or alternatively you
can choose the default option. Within the form there are a number of selections
to be made.
2.1. Search name
Create a Search Name to help you identify it later.
2.2. Schema
Choose database
Schema – this will usually be public.
2.3. Table
Choose Table to search, i.e. the layer.
2.4. Columns to search
Select Columns to Search – which fields do you want the user to be able to search
through.
2.5. Columns to return
Select Columns to return - the first column selected will be the primary column displayed in
the search result, other columns returned will be displayed with less
prominence. It’s best to choose the
least amount possible to keep search results concise. If you’re planning to
categorize your results, the attribute you want to use to categorize will also
be added in here.
2.6. Order results by
Select Order results by – an optional field that will automatically sort your results in
alphabetical order based on this option.
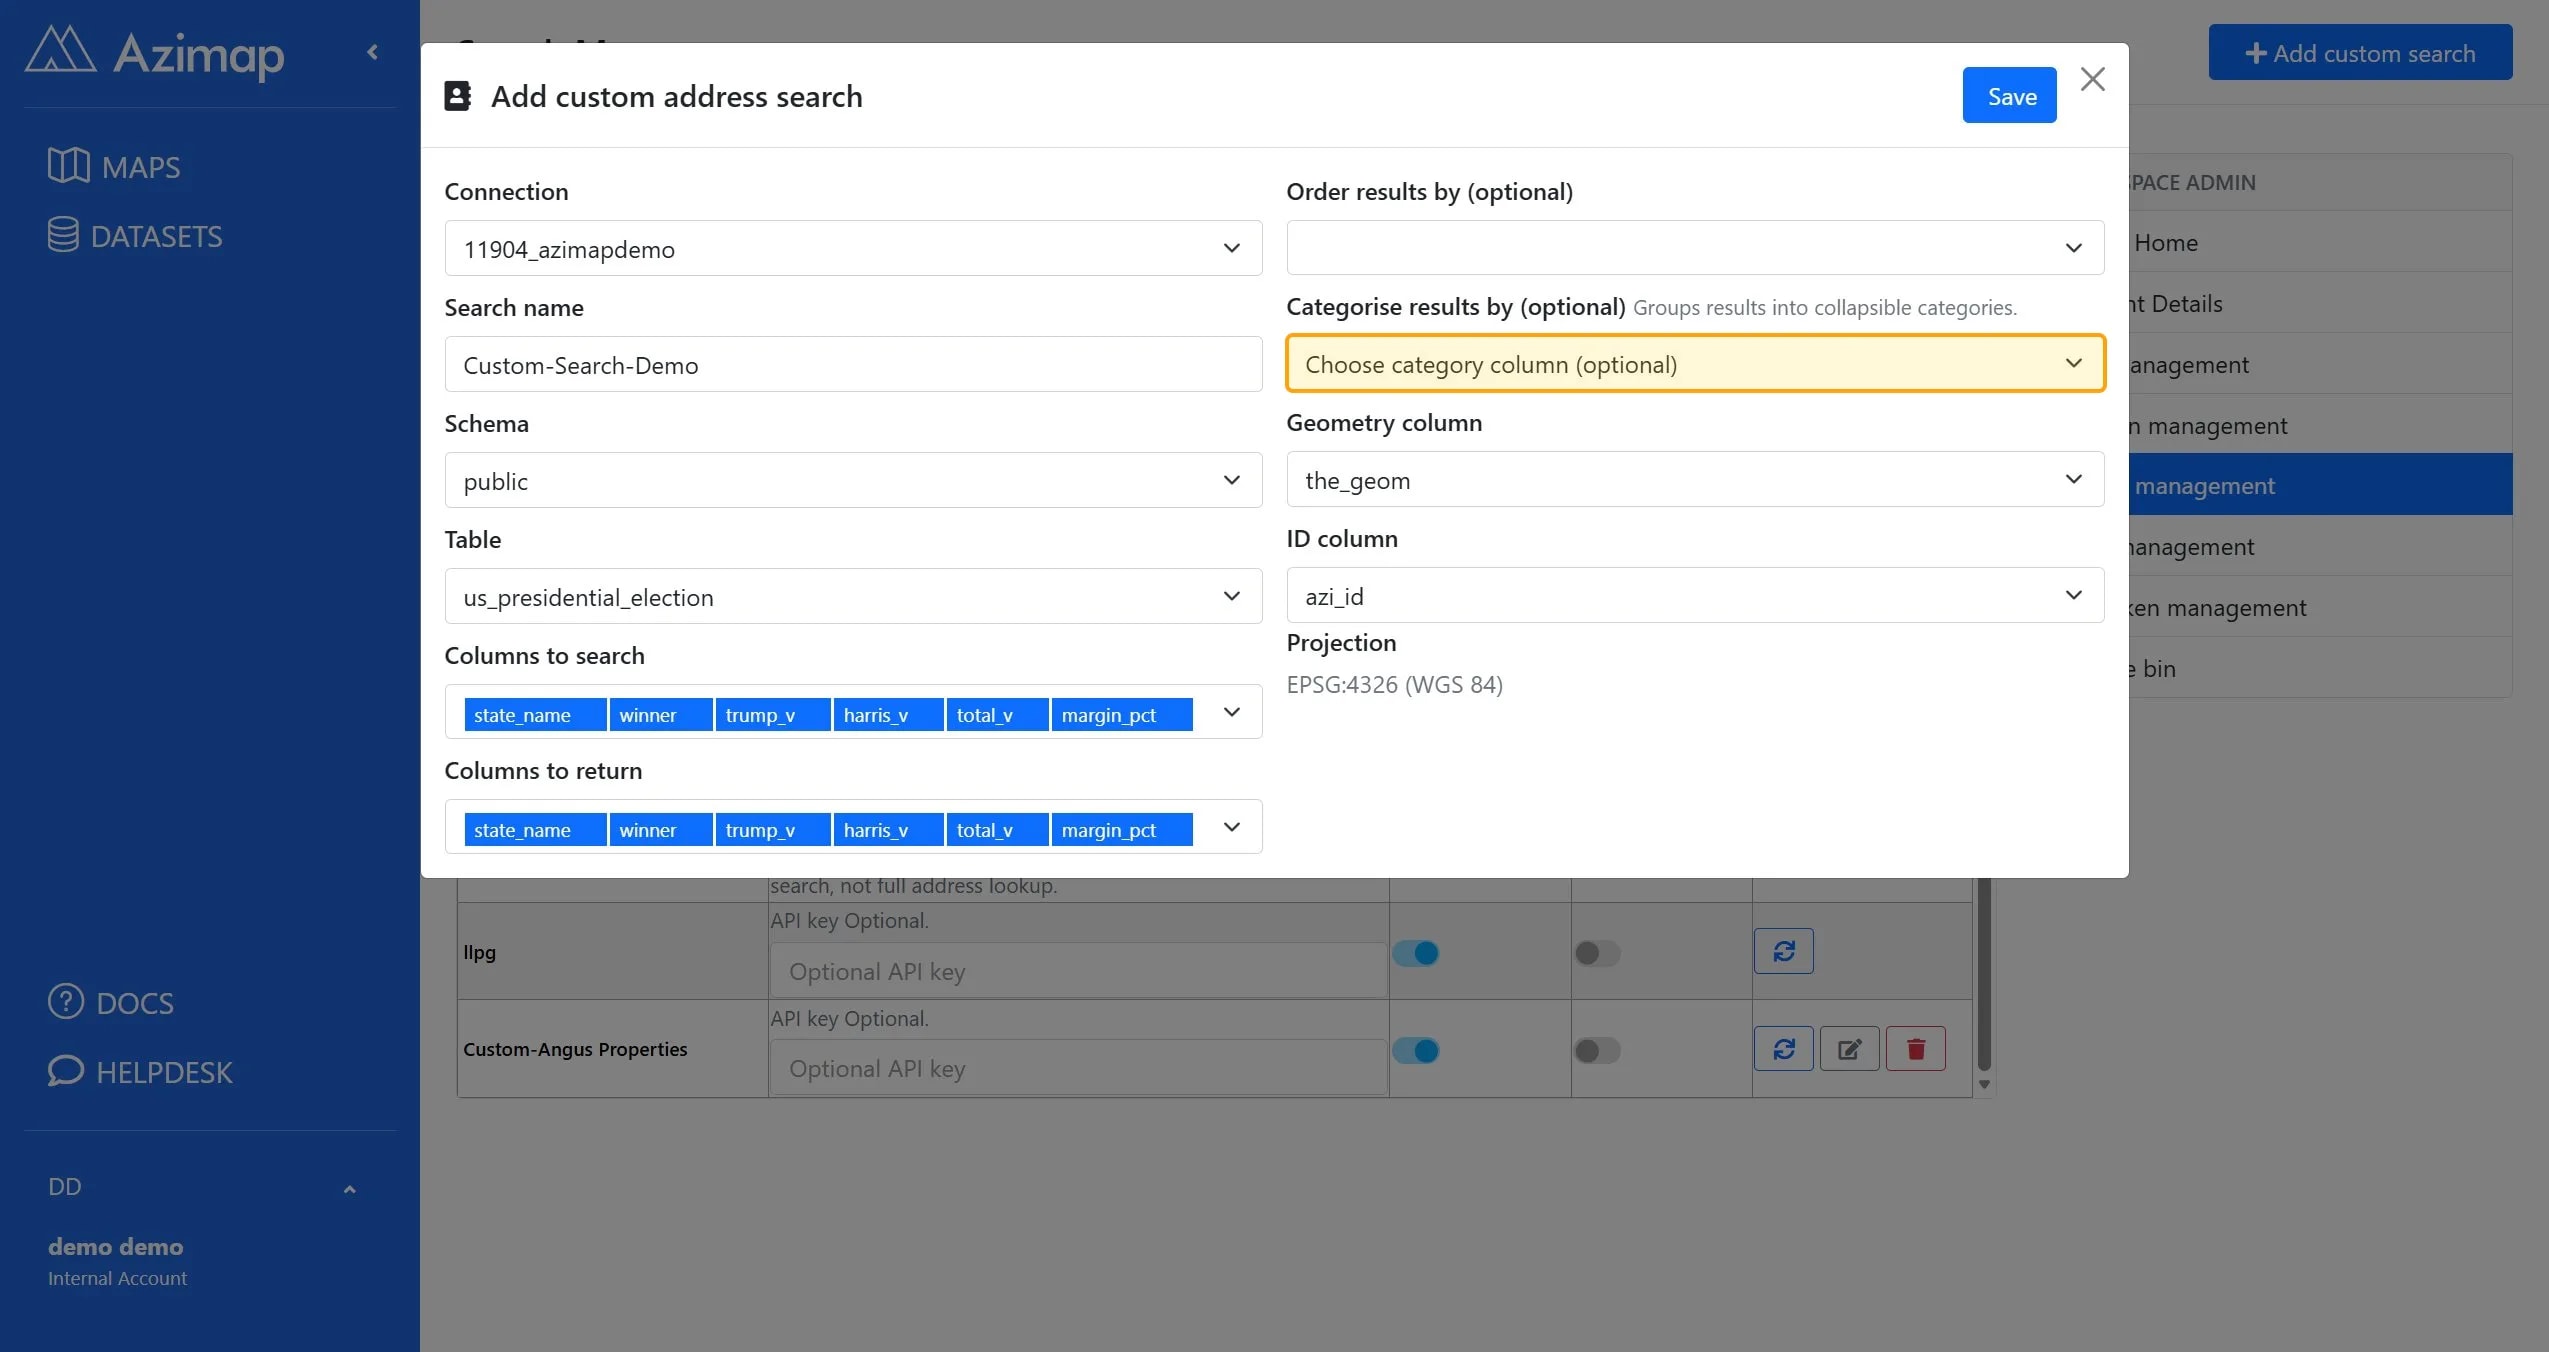
2.7. Categorize results by
Select the
optional Categorize results by column – this will allow you to display your
results in categories if it’s applicable to your data. This works best if you have data that’s
grouped in some way (i.e. if one of your attributes is a drop-down menu to
choose).
Additionally,
you also need to ensure that the same attributes are listed in the Columns to return field.
2.8. Geometry
Select Geometry column (auto selected)
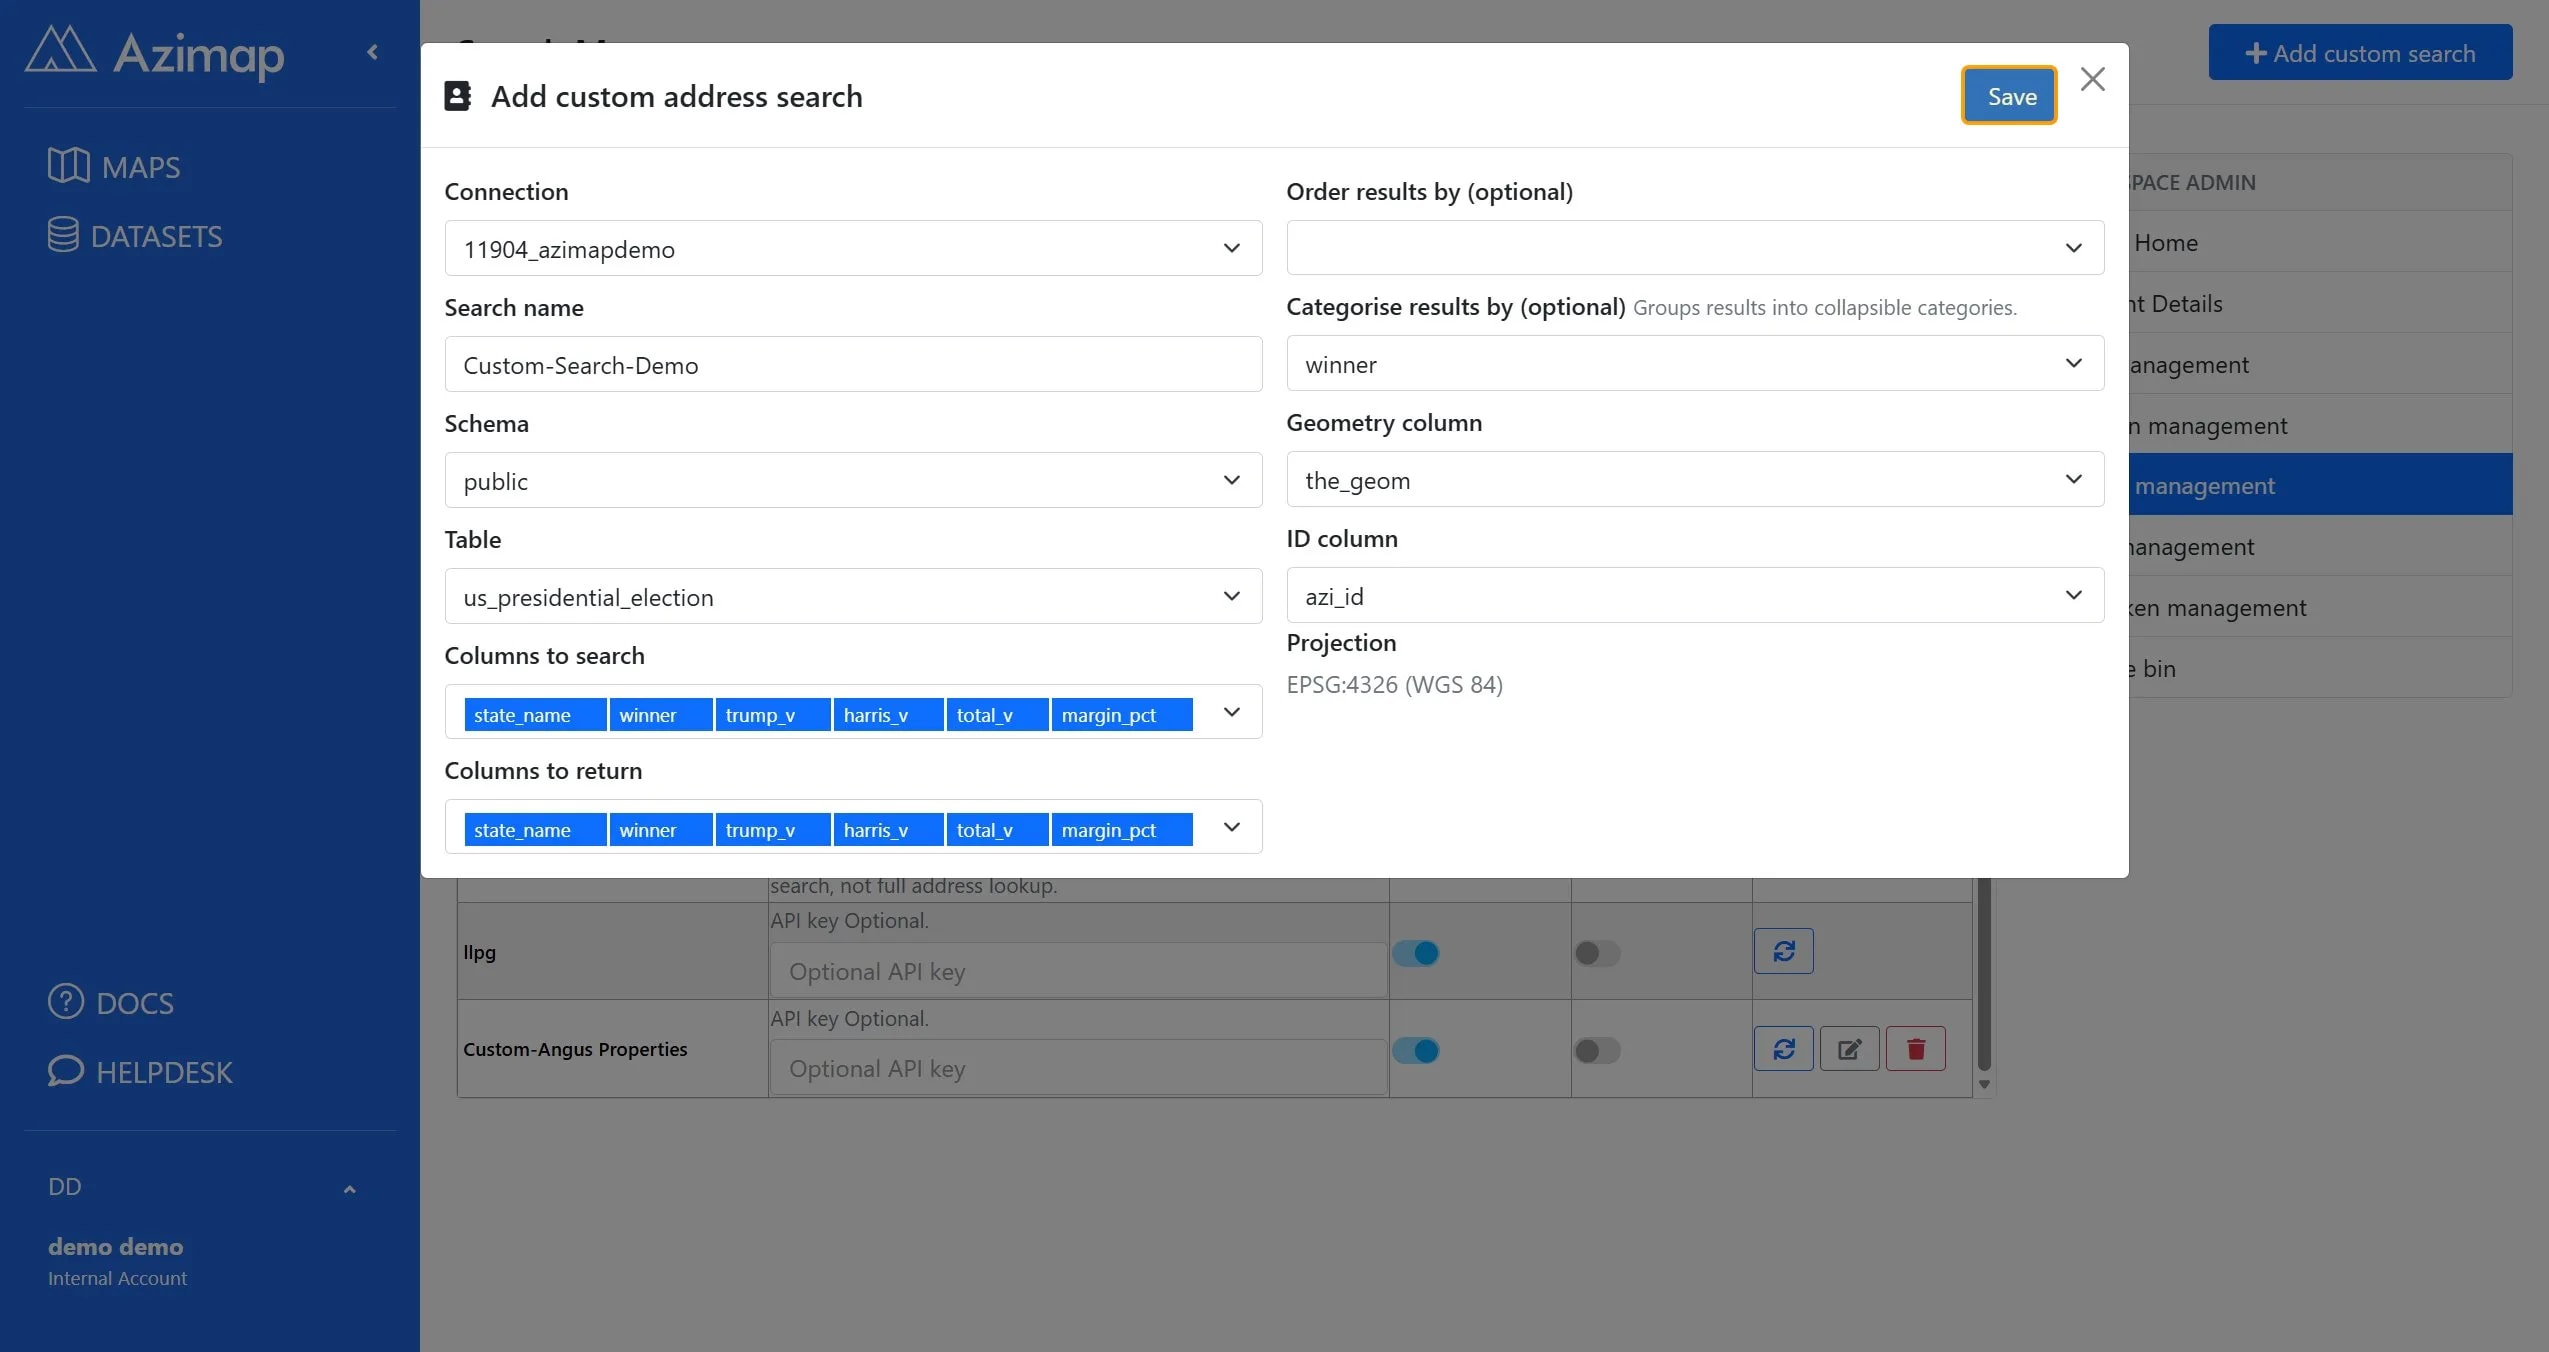
2.9. Your completed form
Click SAVE when
you’re happy with your choices
Here’s
what your completed form will look like.
3. Adding your custom search to your
map
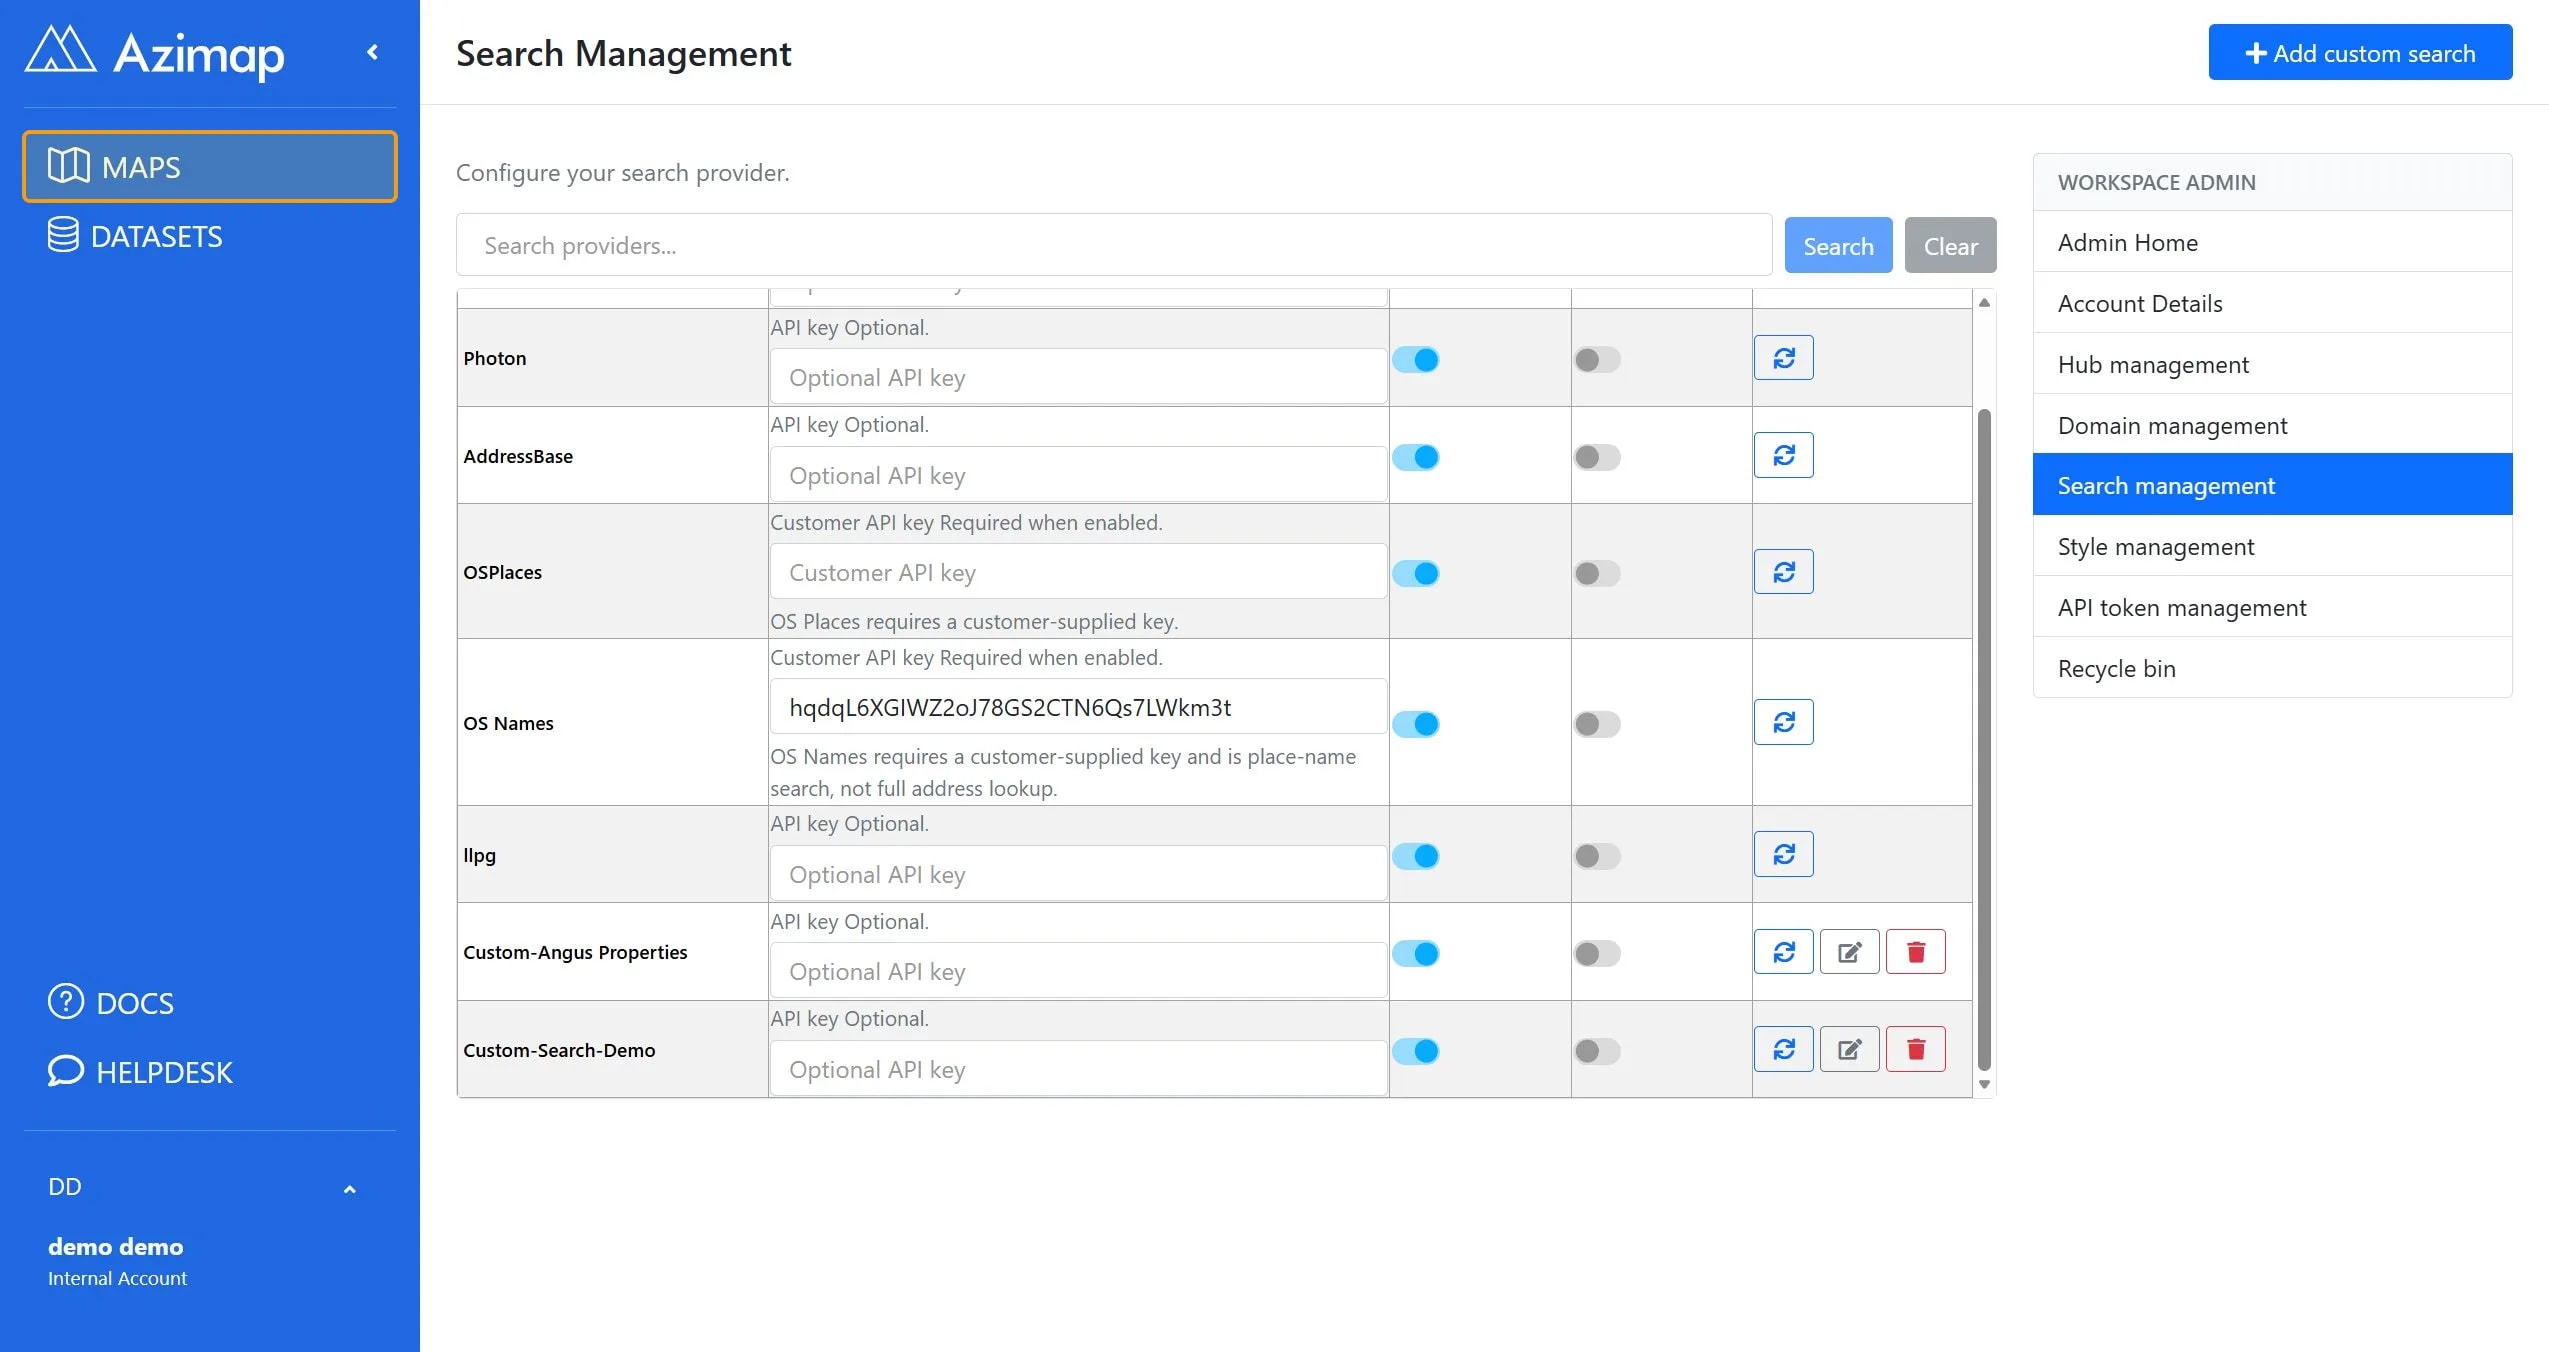
3.1. Configure search address provider
The newly created custom search
will appear in the ‘Address Search Provider’ list. Custom searches can be
edited or deleted at any time.
Make sure to enable it and press
the update button.
3.2. Complete custom search set-up
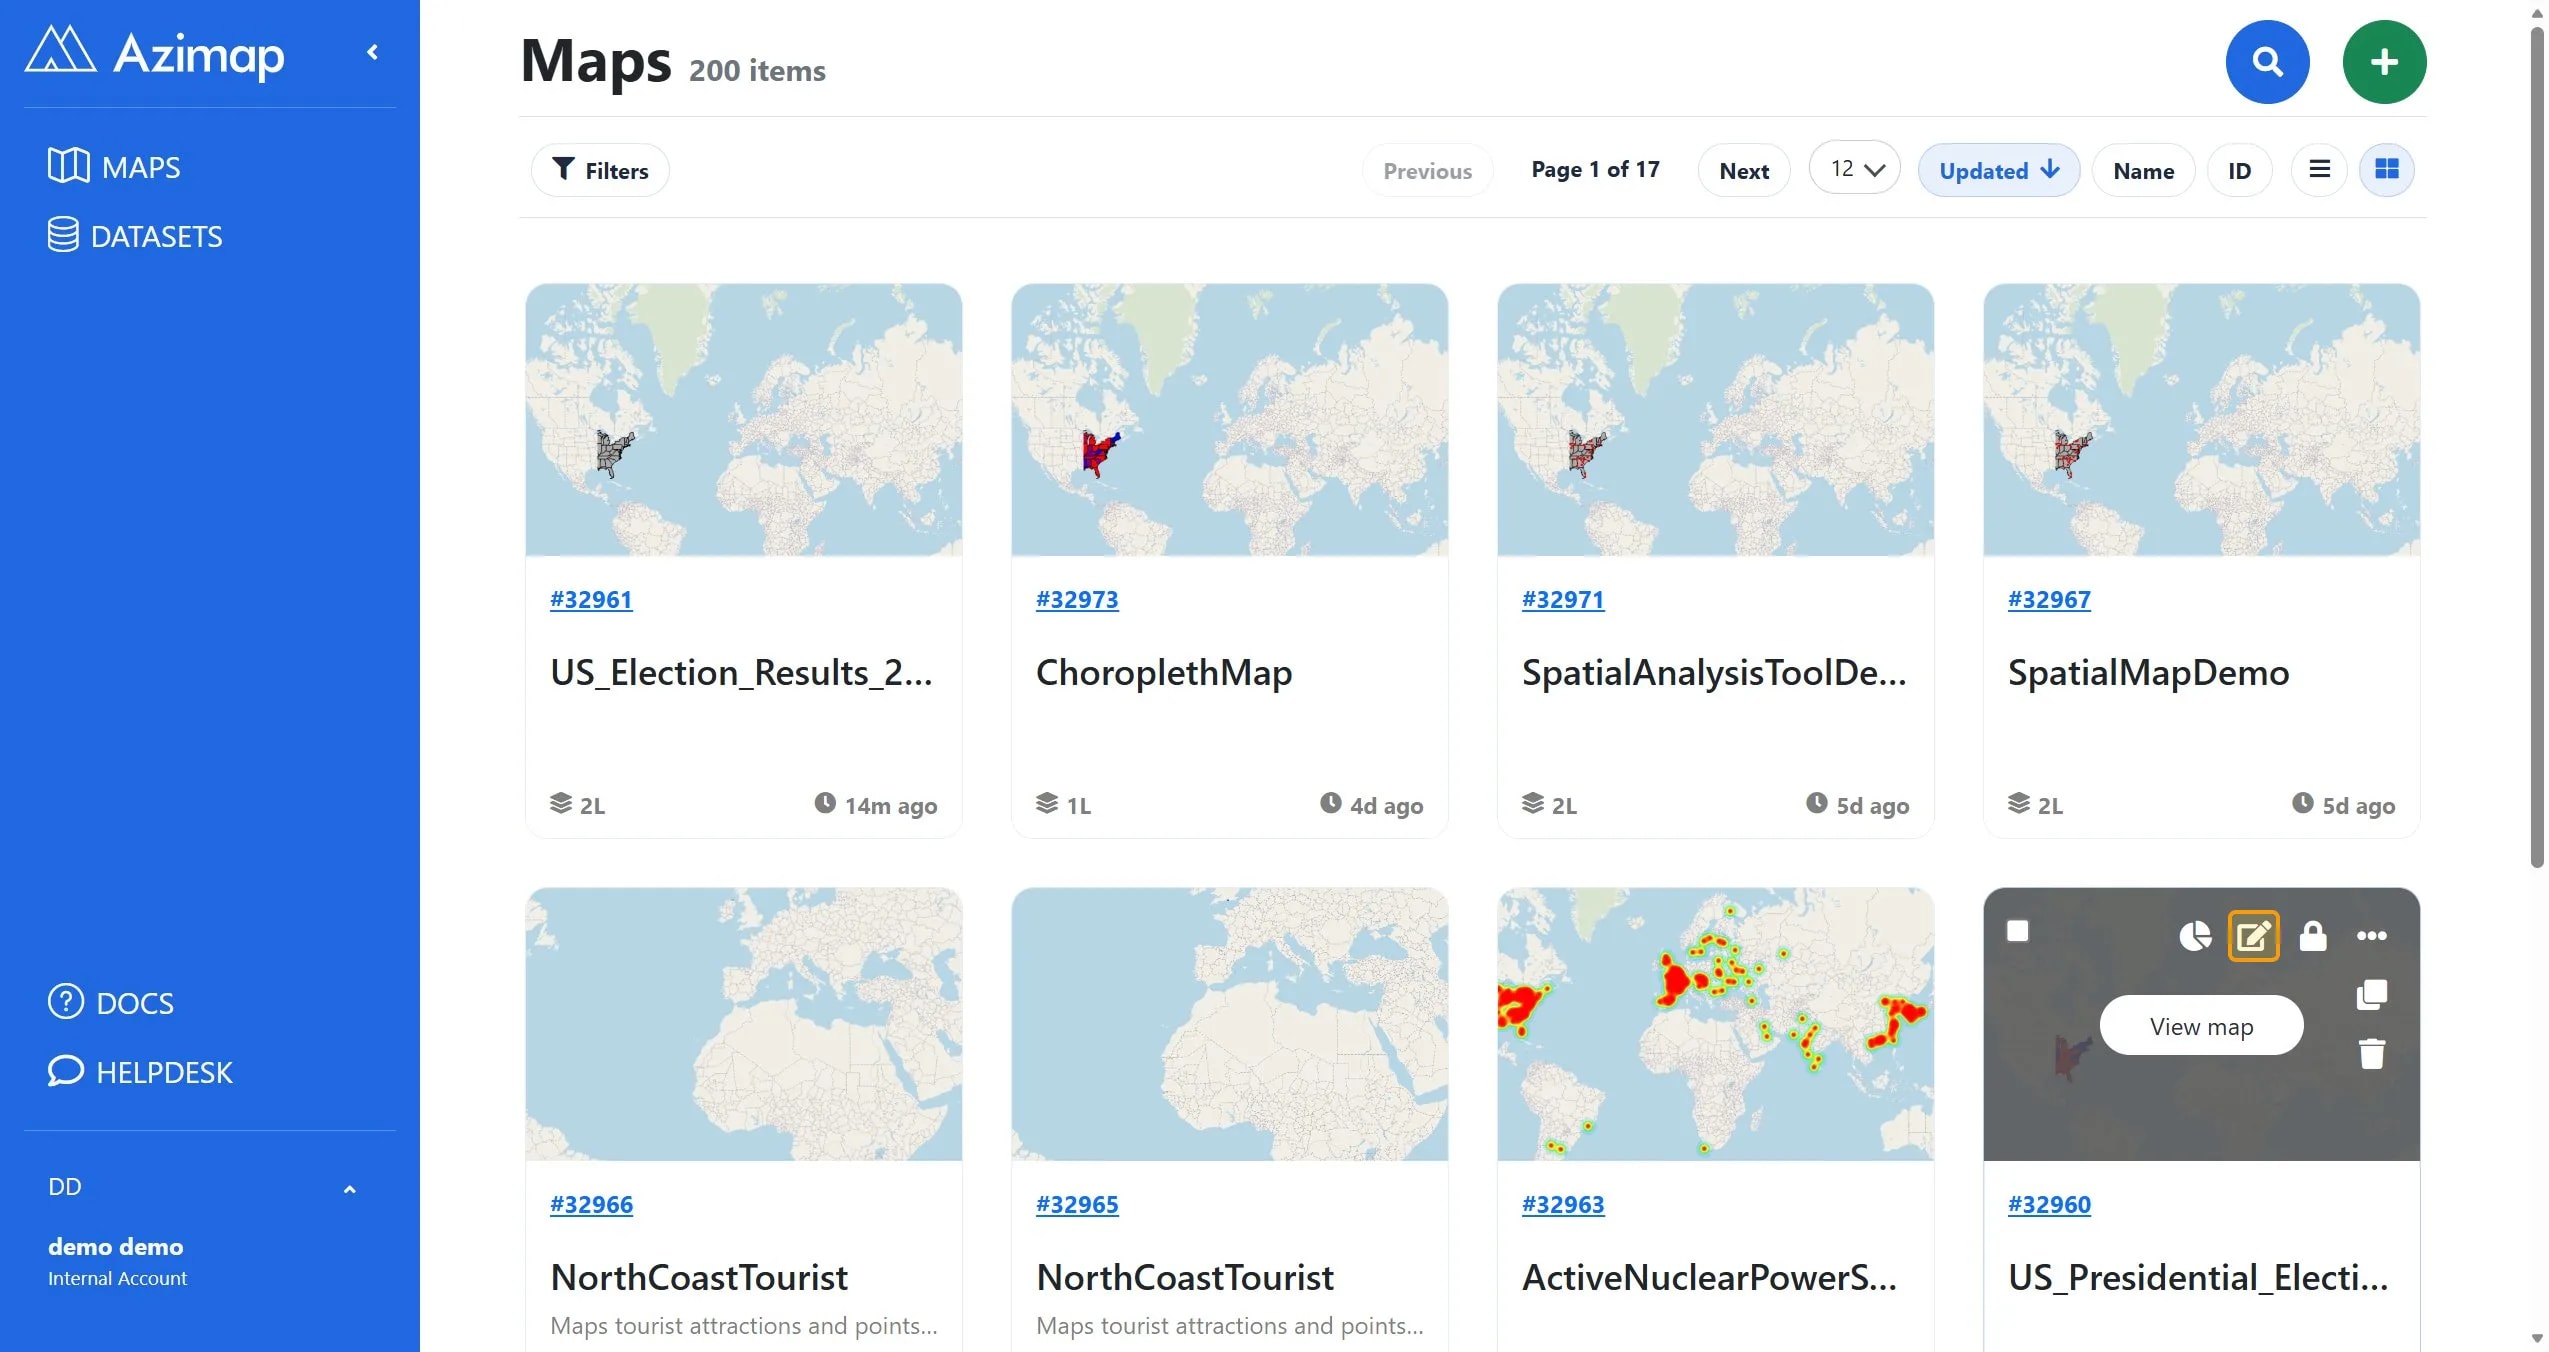
To complete your custom search
setup, navigate to the Edit details section of the map portal.
(Edit
the map you want to add your newly created custom search to).
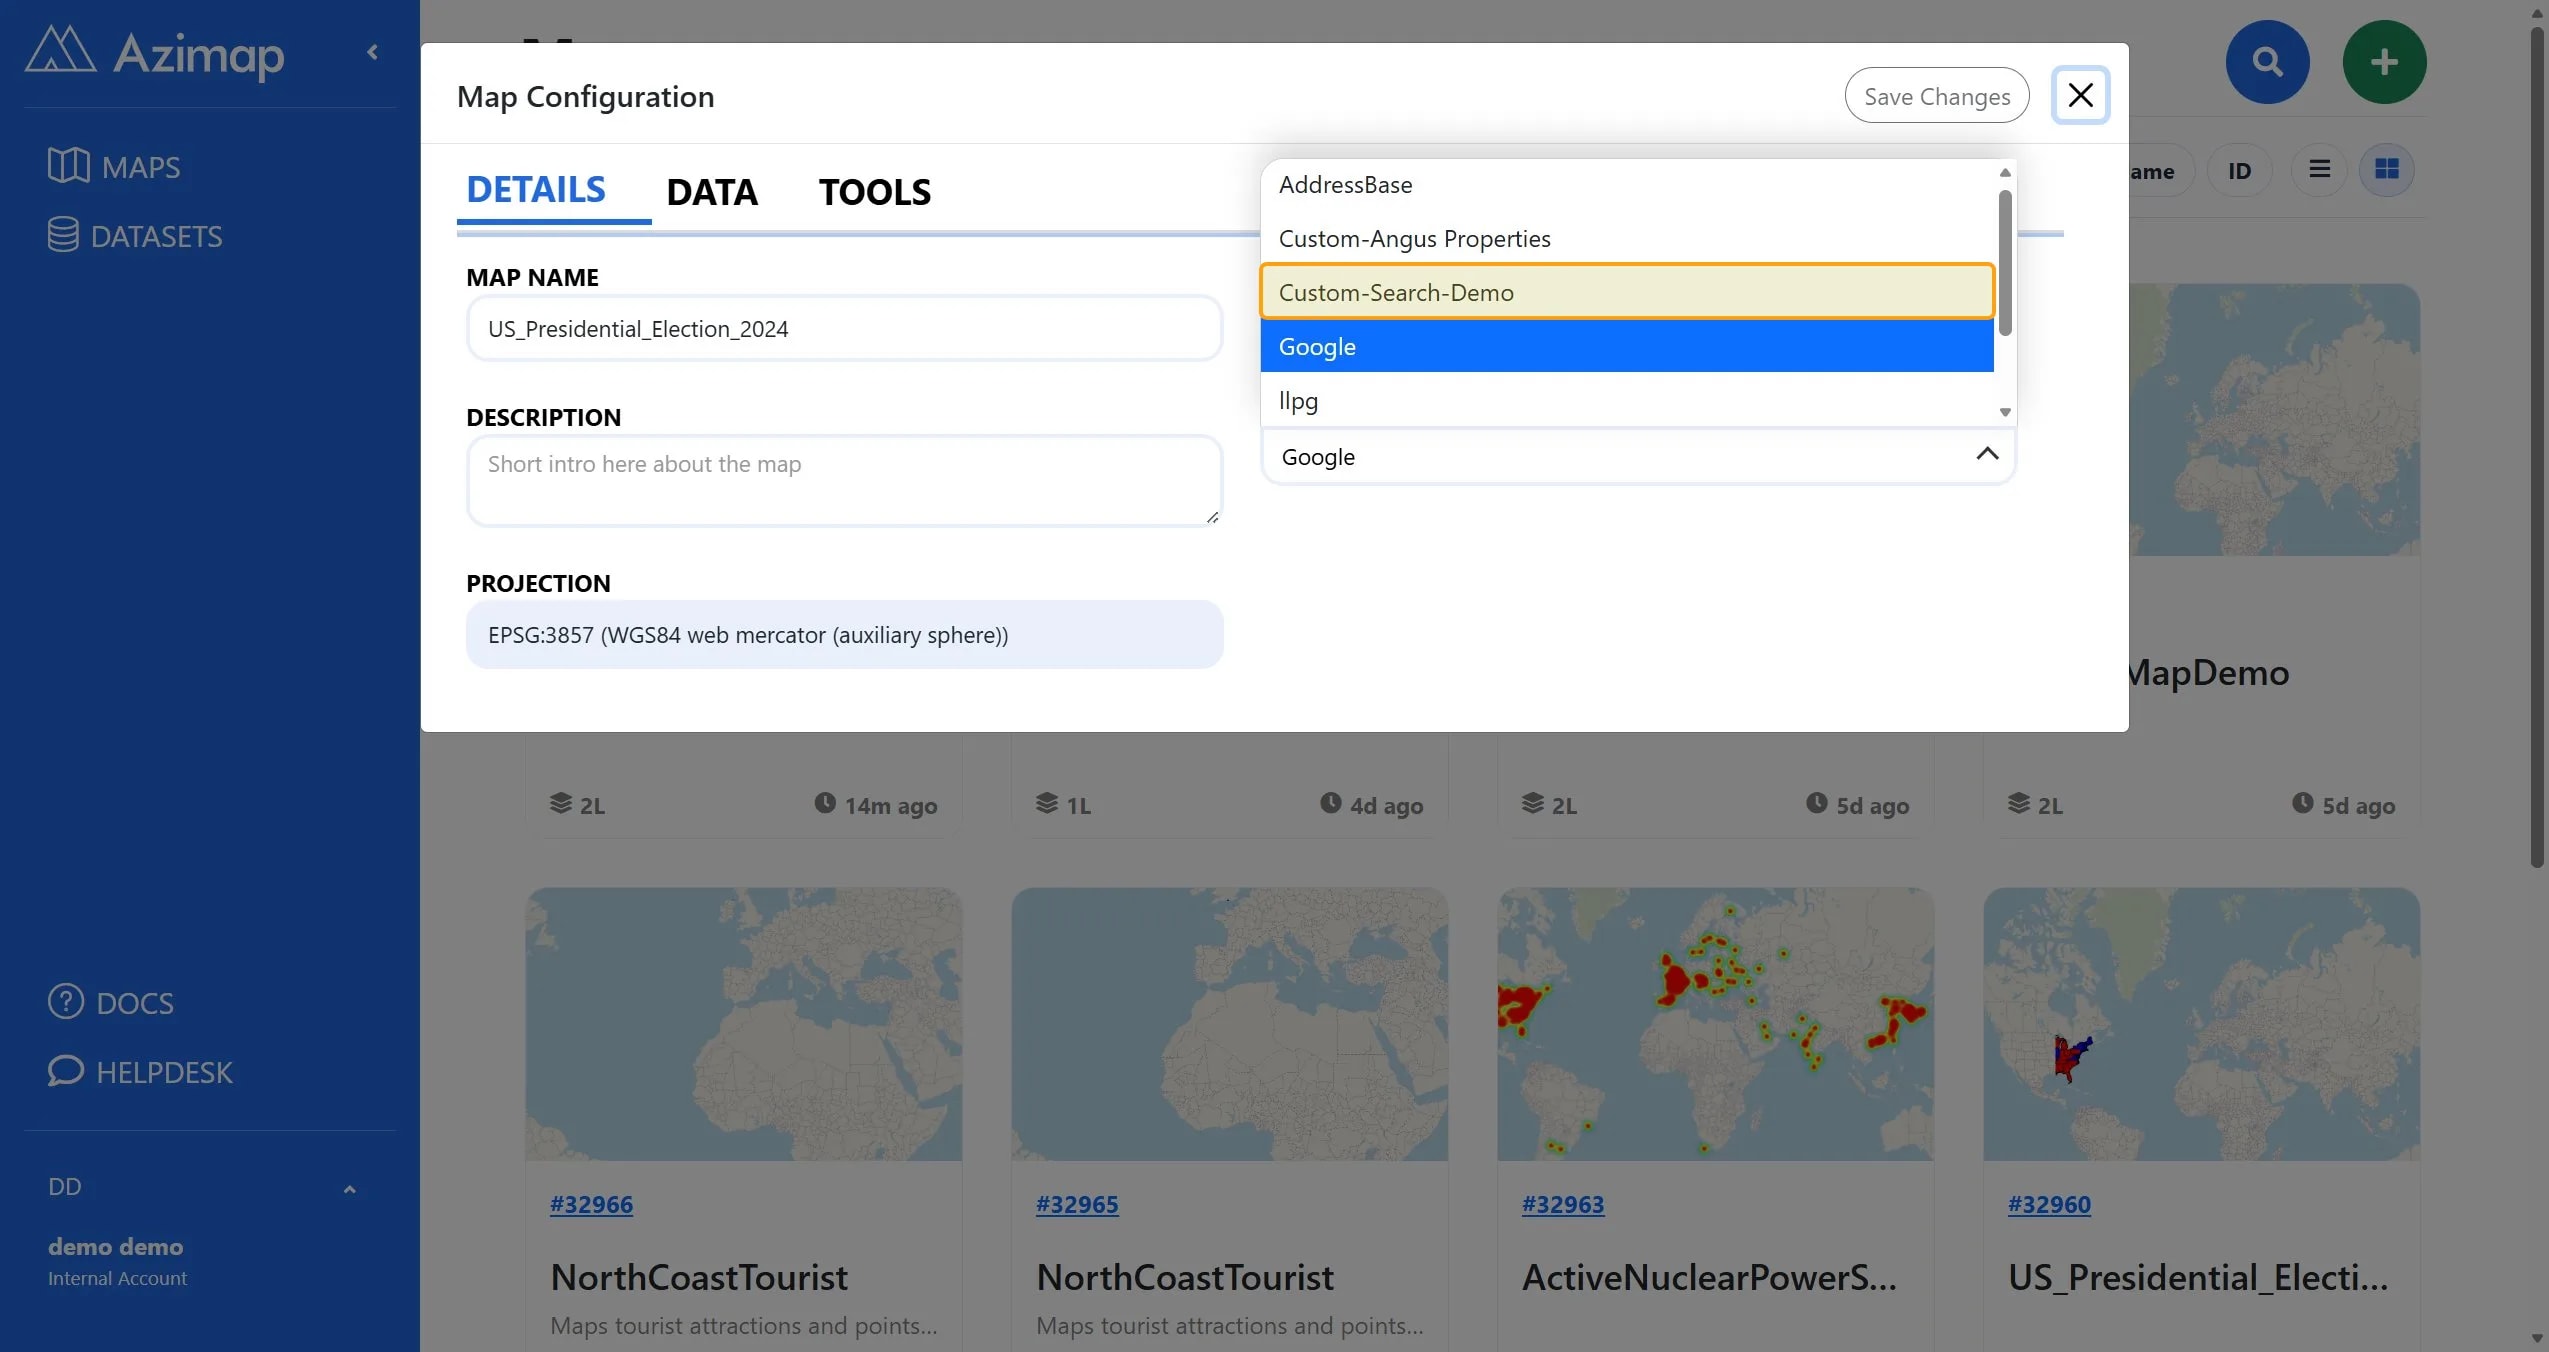
Towards the bottom of the page
you’ll find an Address Type drop-down menu.
Select the name of the custom search that you’ve just created and SAVE.
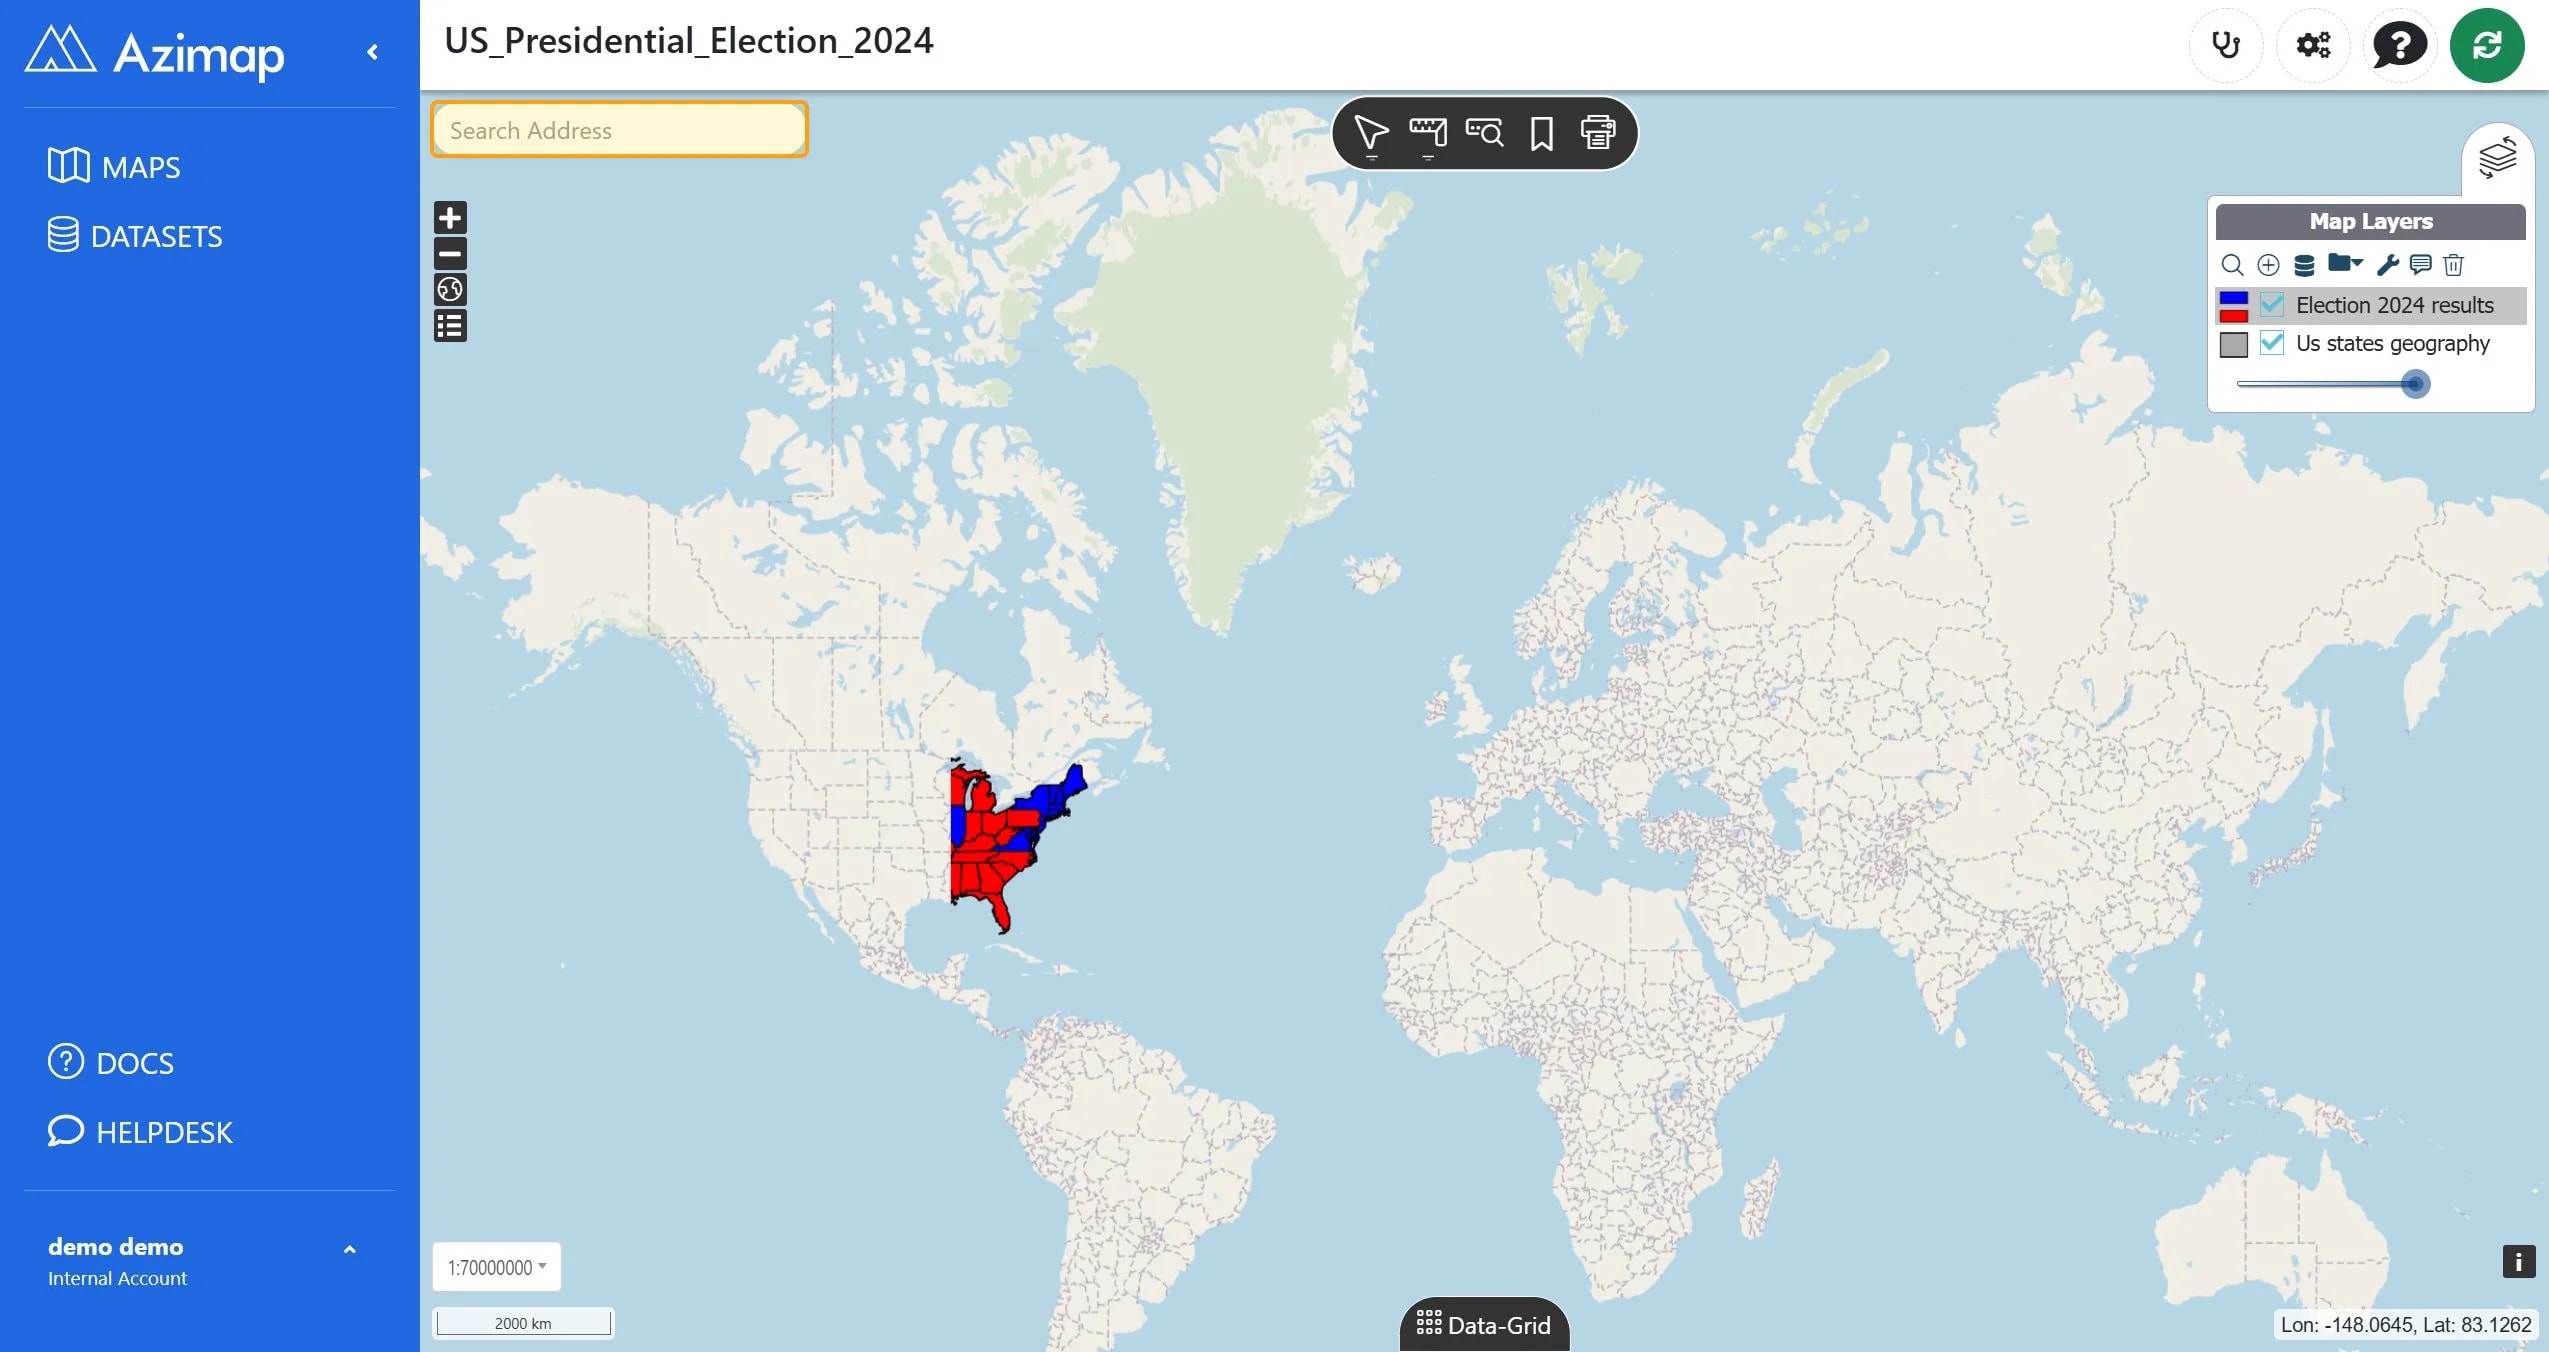
If you access your map and
refresh it, your customised search bar will be ready to use.
Enjoy creating a customised search bar for your map, and if
you have any further questions regarding what you've just read please contact the Azimap Help Desk.