Advanced Configuration of a New Map
This guide will take you through the components under
the ‘Advanced’ settings when creating your new map.
Contents
1. Getting started with a new map
2. Setting
advanced map options
3.
Edit your map
details
4.
Editing your toolbar
4.1 Turn your toolbar off
4.2 Configure individual tools
5.
Save your map
features
6.
View your new
map
1.
Getting
started with a new map
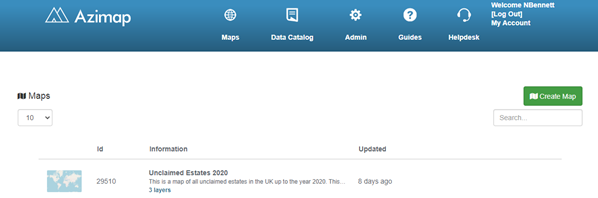
To get started with a new map simply, click on
the CREATE MAP button.
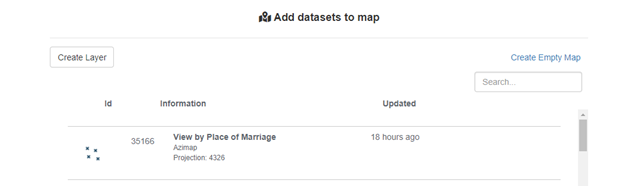
The 'Create Map' wizard will appear. Enter a map name and optional description, then click NEXT.

You could create and view a map immediately
by clicking CREATE EMPTY MAP. Alternatively you can choose to create a layer or pick one or many of your existing layers.
2.
Setting advanced map options
The next screen in the wizard will allow you to add additional functionality to your map.
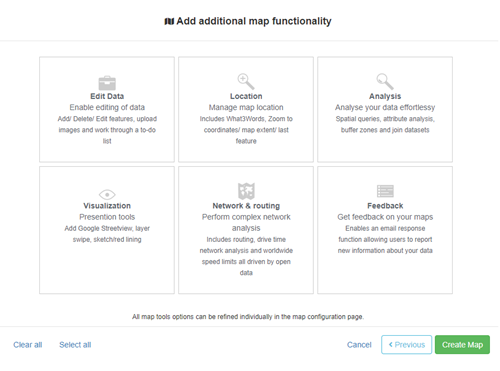
Additional functionalities you can add include:
- Edit Data - Enable editing of your data. Add, delete or edit features. Upload your images and work through a to-do list.
- Location - Manage your map location, to include What3Words and zoom to coordinates, map extent or last feature.
- Analysis - Analyse your data effortlessly. Includes spatial queries, attribute analysis, buffer zones and join datasets.
- Visualization - Presentation tools such as adding Google Streetview, layer swipe or sketch/red lining.
- Network and Routing - Perform complex network analysis such as routing, drive-time network, analysis and worldwide speed limits all driven by open data.
- Feedback - Get feedback on your maps. This enables an email response function allowing users to report new information about your data.
3.
Edit your map details
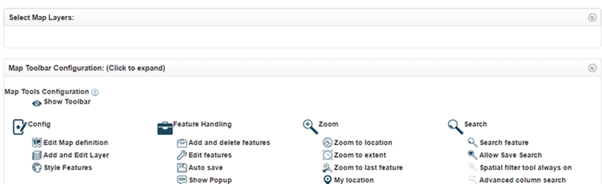
The 'Map Configuration' page features a number of different options to help set your map up.
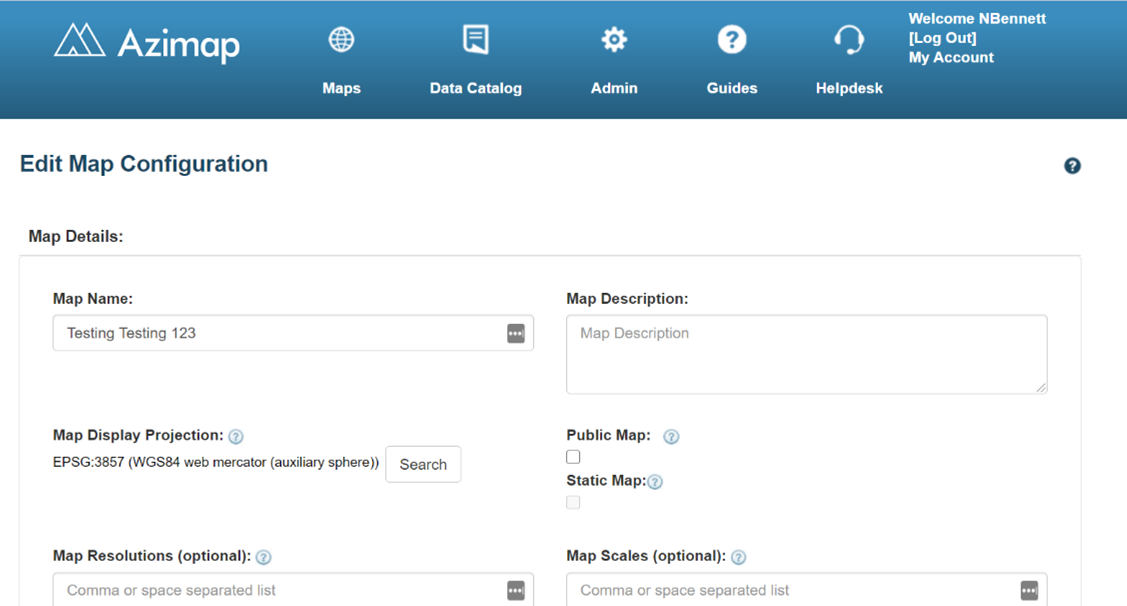
These include:
Map Name - use this space to
enter a name for the map you are about to create. Maps can
be named anything you like, up to 69 characters in length, but try to choose a name
that’s memorable and relevant to the map you’re creating.
This will enable you find the map quickly and easily in
the Map Portal.
Map Description - use this
space to enter a description for your map. This section is
entirely optional, but it could be used to provide additional information which
describes the contents of the map in more detail than possible in Map Name space.
The map description will be displayed alongside the MAP ID and MAP NAME in the Map Portal.
Map Display Projection/ESPG -
the projection for your new map is by default set to ESPG:3857.
To change the projection, click on the search icon and type in the name
of your desired projection. This will generate a list of projections with
similar names. To confirm the change, simply click on the name of your
chosen projection. N.B. Please choose your Map
Projection carefully as this cannot be changed once your map has
been created. To learn more about map projections, read the Import Your Data guide here.
Public Map - selecting this option will make your map shareable
and can be viewed outside of your account. This option is useful should
you wish to embed your map on a website or share it with a
team member. If you wish to keep your map private and only
viewable by yourself, make sure to leave the option unticked.
Map Resolutions (Optional) – An advanced function that’s
only required when matching to Cached Gridset.
Map Scales (Optional) - Another advanced function that
allows you to set the scales in the zoom chooser. Warning:
Changing the map scales may affect map layer scale options. Please review any
layers this might apply to.
Map Start Zoom Scale (Optional) – Use this function to override the zoom level of the initial map load. Great if you want to be able to specify the level at which your map opens up.
4.
Editing your toolbar
Once you have entered the details
for your map, you can configure the toolbar that
will appear above your map. This enables you to choose the
tools you wish to be accessible when editing your map.
4.1
Turn your toolbar off
If your map is to be made available to the
public, it is also possible to turn the toolbar OFF. To turn
the entire toolbar OFF, simply click on the SHOW TOOLBAR option.
Turning the toolbar off will enable a map to be viewed
but not edited.
4.2
Configure individual tools
To configure the individual tools
that will appear on the map toolbar, simply click the tool you
wish to turn ON or OFF. It’s also possible
to turn all tools within a group ON or OFF by
clicking on the Group Name. Tools which have been
turned ON or OFF can be easily identified by
looking to see if the individual icon is in bold or greyed out. An
example of this can be viewed below:
Tool ON
Tool OFF
N.B. Tools
can be turned on or off even after the map has been created,
unless the toolbar has been turned off completely. In this instance, only
the owner of the map can turn the toolbar back on from within
the Map Portal.
For further information on the
role of each individual tool and how to use them, please refer
to the AziMap
Tools and AziMap
Advanced Features sections of this user guide.
5.
Save your map features
Once you’re happy with the
details of your map and the configuration of the toolbar,
the map can be saved. To do this click the SAVE button
underneath the Map Toolbar Configuration section.
Your saved map will now appear in the Map Portal.
When the map has
been saved, you will be presented with a message saying that your new map has
no layers. To learn how to create a new layer for
your map visit the Creating
a Layer section of the user guide or to add an existing layer to
your map, see the Select Map Layers section of the user guide.
6.
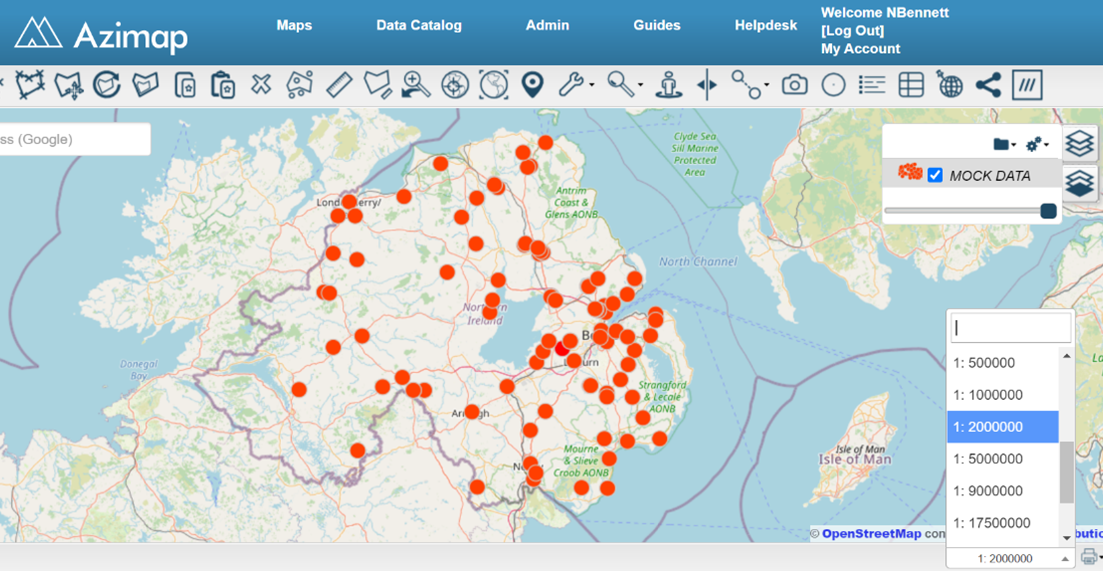
View your new map
To view the map you
have just created, click the VIEW MAP button at the bottom of
the page.