How to Use Route Planning
The routing function in Azimap will enable you to
create a route or path from A to B. In
this guide we will show how to utilise the route planning tool in Azimap.
Time to complete: 5 mins
Contents
1. Getting started
1.1 Open an existing map
1.2 Select the routing tool
2. Basic
tools to create your route
2.1 Capabilities
of the routing tool
2.2 Placing
destinations on your map
2.2.1 Using
the CTRL key
2.2.2 Address
search
2.2.3 Adding
‘via’ destinations
3.
Advanced
features
3.1 Clone route lines
3.2 Fastest route and the travelling salesman problem (TSP)
3.3 Route optimisation
1. Getting started
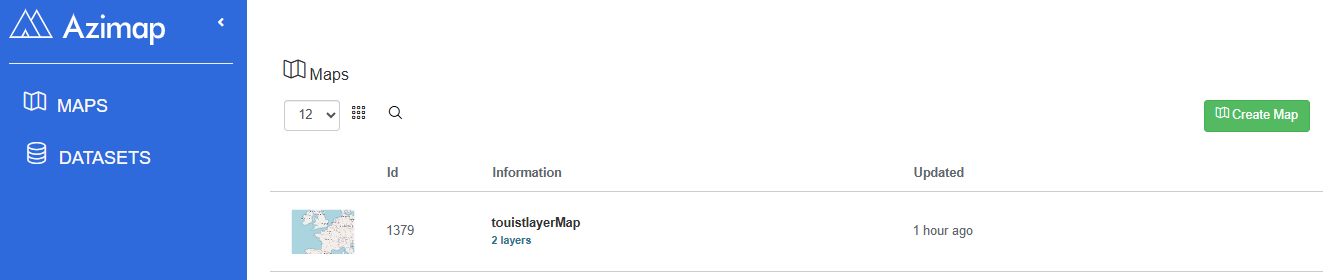
1.1. Open an existing map
Click on the row of your chosen map.
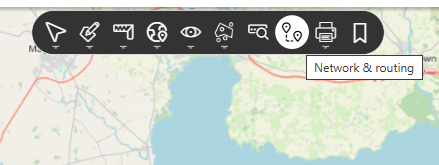
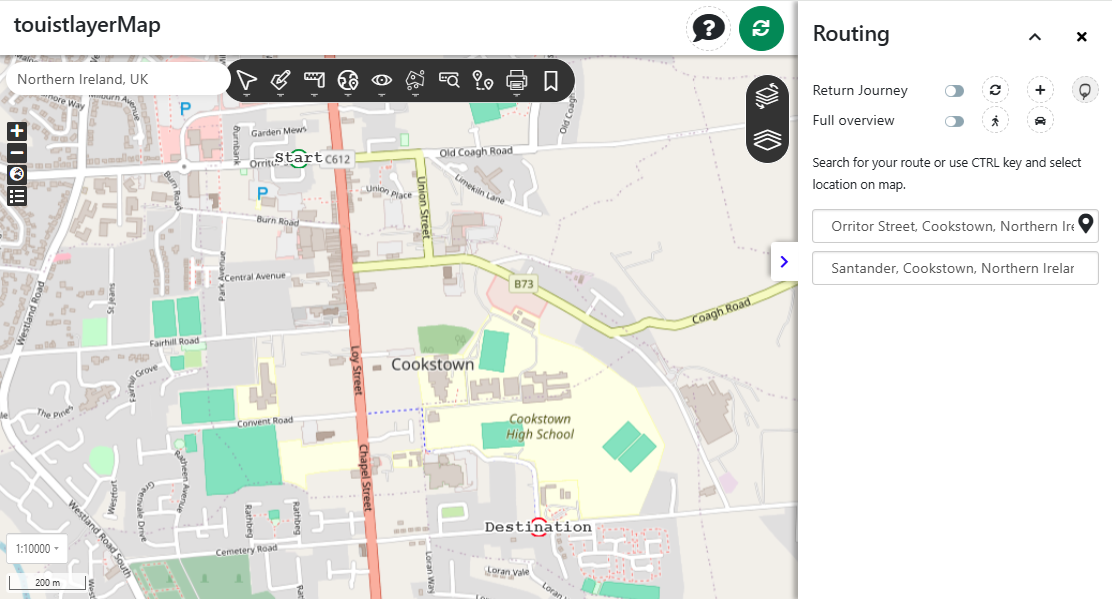
1.2. Select the routing tool
On the toolbar, select the NETWORK & ROUTING tool from the toolbar.
This opens the Analyse route networks or plan your road/walking journey menu on a side panel. Select the ROUTING.
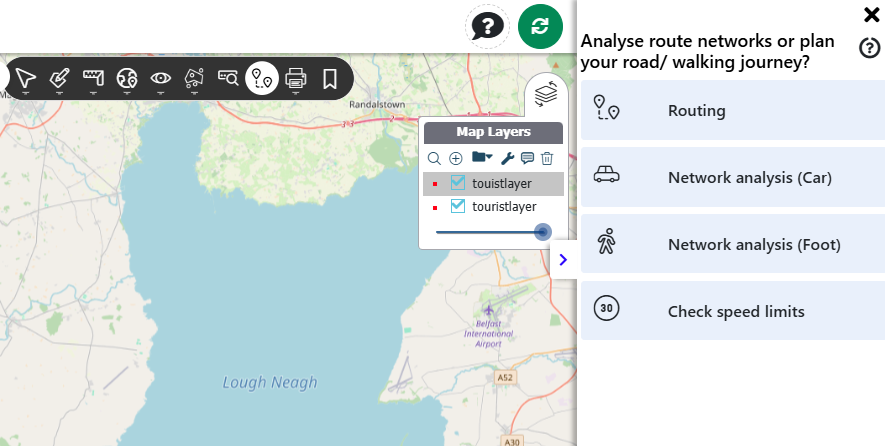
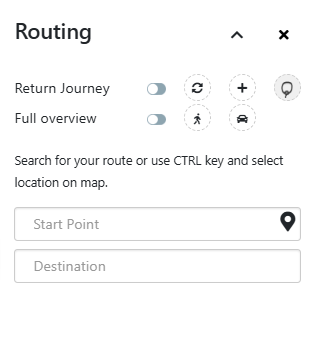
This will open up the ROUTING side panel.
2. Basic tools to create your route
2.1. Capabilities of the routing tool
On this panel you can do a number of things:
- Search for a start and end point using our geo-coding service
- Set the start point as current location based on IP

- Add new destinations (will turn previous final destinations into
‘via’ destinations)

- Select multiple points on map to route between

- Select return journey or not
- Print successful route**

- Download Route Geometry

- Click on the map using the CTRL key to set destinations
- Reset search

- Generate route by car search

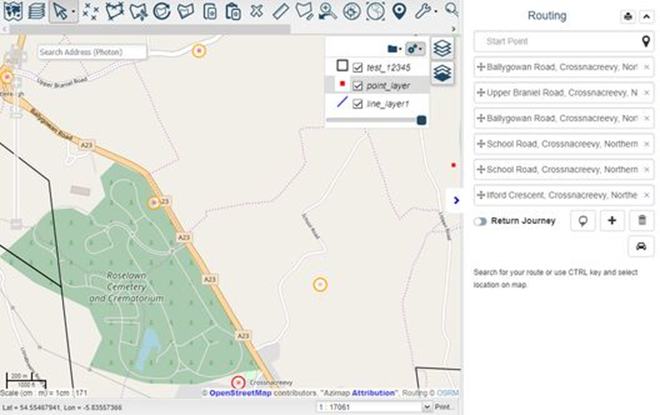
2.2. Placing destinations on your map
2.2.1. Using the CTRL Key
Start/ destination locations can be placed using CTRL key and clicking
map location, this will place a coloured circle on the map and populate the
appropriate search box with an address:
- Green – start point
- Amber – via destinations
- Red – final destination
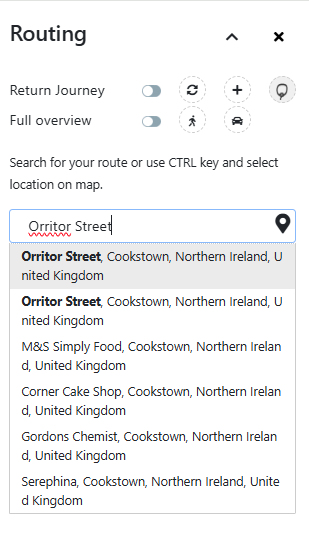
2.2.2. Address search
Alternatively, addresses can be searched using our geo-coding service
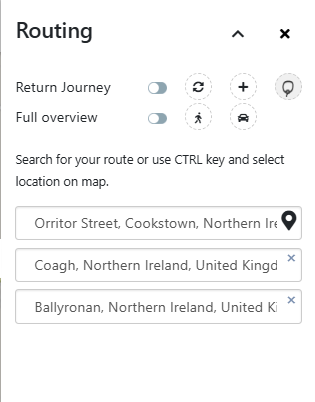
2.2.3. Placing ‘via’ destinations
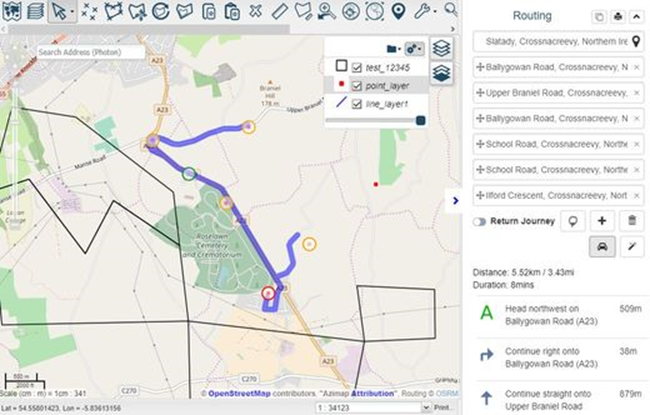
As many new ‘via’ destinations can be added as desired
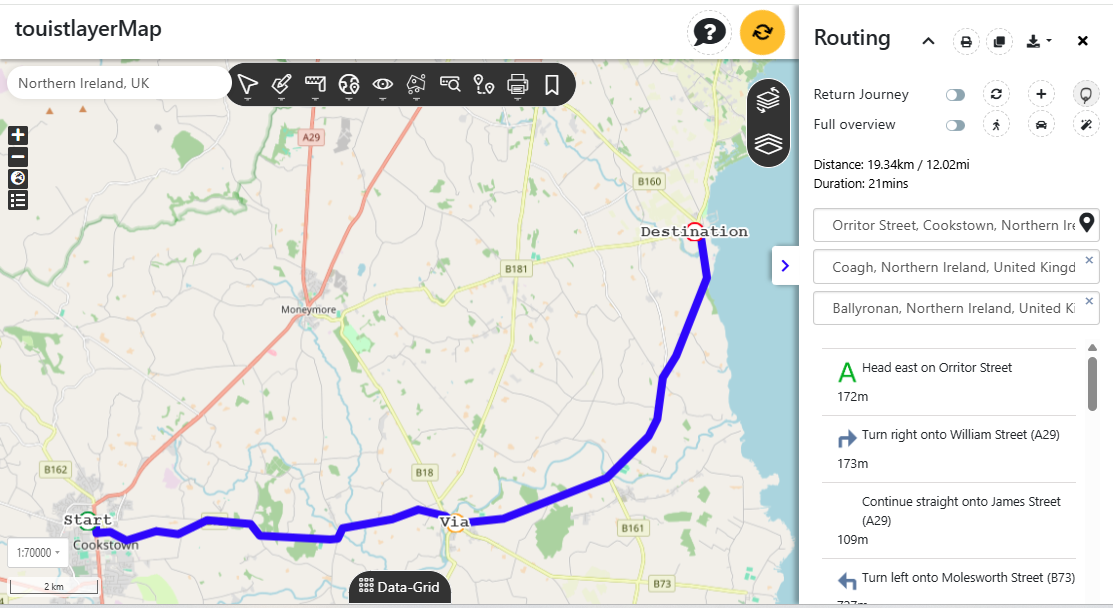
Press the search button  to get your route. Results will be
displayed on the map and turn by turn instructions in the routing panel. A
distance time overview is displayed above the results.
to get your route. Results will be
displayed on the map and turn by turn instructions in the routing panel. A
distance time overview is displayed above the results.
Map and instructions can be printed** showing route map and instruction
using print button in top right of panel.
The map will save as a PDF to your downloads folder.
3. Advanced features
3.1. Clone route lines
Route lines can be cloned using the clone button in the top right of the
panel.  To successfully clone a
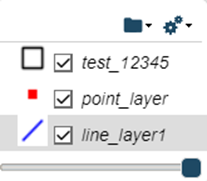
route line you must select a receiving line layer in the layer selector.
To successfully clone a
route line you must select a receiving line layer in the layer selector.
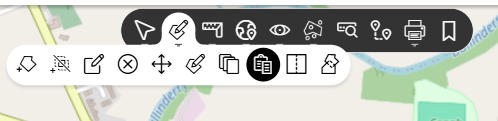
Use the paste button on the toolbar to paste the route line onto an
available line layer
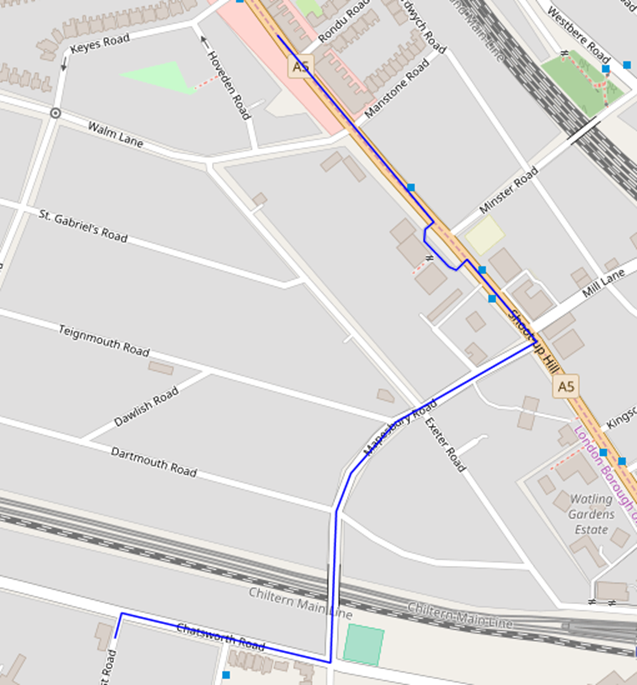
Results should display like the below image
3.2. Fastest route and the travelling salesman problem (TSP)
Azimap can solve the TSP - Given a list of destinations and the
distances between each pair, what is the shortest possible route that visits
each destination exactly once and returns to the origin destination?
Points can be selected using the lasso selector 
These will add new destinations to the route planner auto populating the
corresponding addresses. Set your start
point by using the CTRL key and clicking the map or searching for an
address or by your current location.
Clicking search will supply an optimized route between all selected
locations between the fixed start and end point as shown below.
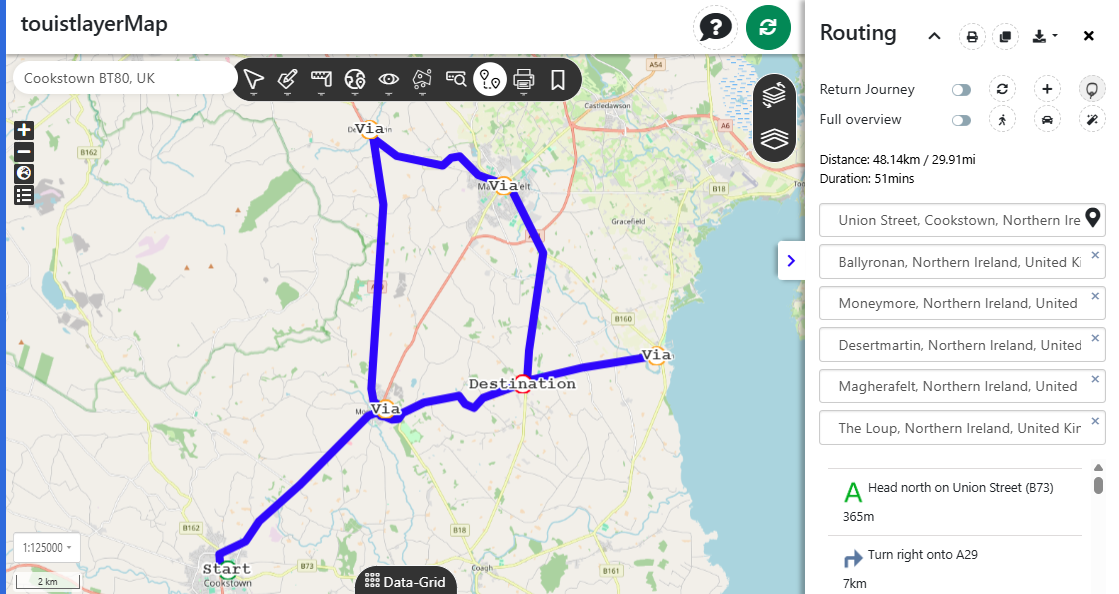
3.3. Route optimisation
Users can search for or select multiple destinations. The route will be calculated in the order
that the destinations are listed. Example below of a poorly optimised
route with lots of back tracking.
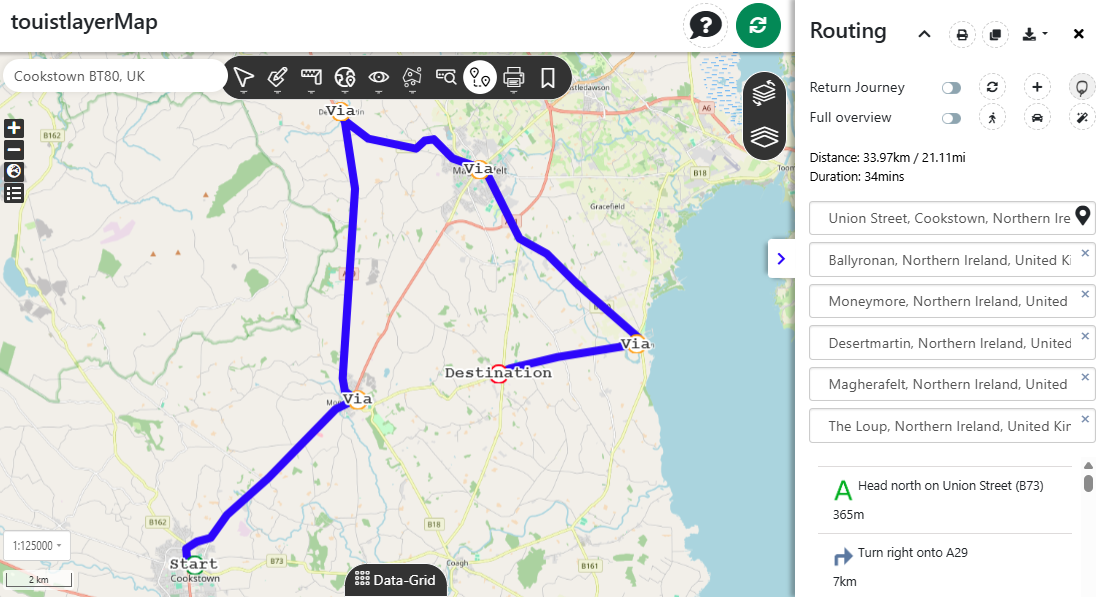
After running a route you can optimize it using the wand button  for the most efficient route
to all destinations with a fixed start and end point and optional return to
start. Newly optimized route pictured below.
for the most efficient route
to all destinations with a fixed start and end point and optional return to
start. Newly optimized route pictured below.
That’s all for our routing!
Thanks for reading the guide and we hope you plan your future routes
with Azimap.
If you haven't signed up yet go to the Azimap website and click REGISTER.
Azimap currently utilises our own geo-coding and routing service powered
by Photon and OSRM respectively. Photon is an open source geocoder built
for OpenStreetMap data. Open Source Routing Machine
is a High performance routing engine designed to run on OpenStreetMap data.