Create
a Picture Map
Use Azimap to create a picture map of all the wonderful attractions in
your town!
In this guide we’ll show you how to create a new map and layer in Azimap
and upload/attach images to plotted locations to create a picture map. We’ll use a working example
and create a tourist map of Edinburgh. Our final sample Edinburgh Tourist Map.
Images used in tutorial available at: images.zip
Time to complete:
20 mins. (depending on data being captured)
Contents
1. Getting started
1.1 Create a new map
1.2 Add a new layer to your map
1.3 Add an attribute
2. Configure
the pop-up
3.
Create your attractions
3.1 Draw your first attraction
3.2 Add images to attractions
3.3 Repeat steps 3.1 and 3.2 for each attraction
1. Getting started
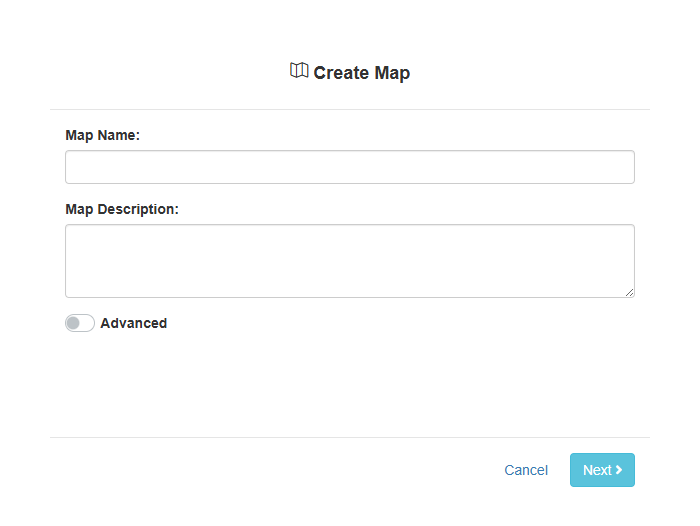
1.1. Create a new map
Click on MAPS section and click CREATE NEW MAP.
This will take you to the new map wizard where you can name your new map and press NEXT.
1.2. Add a new layer to
you map
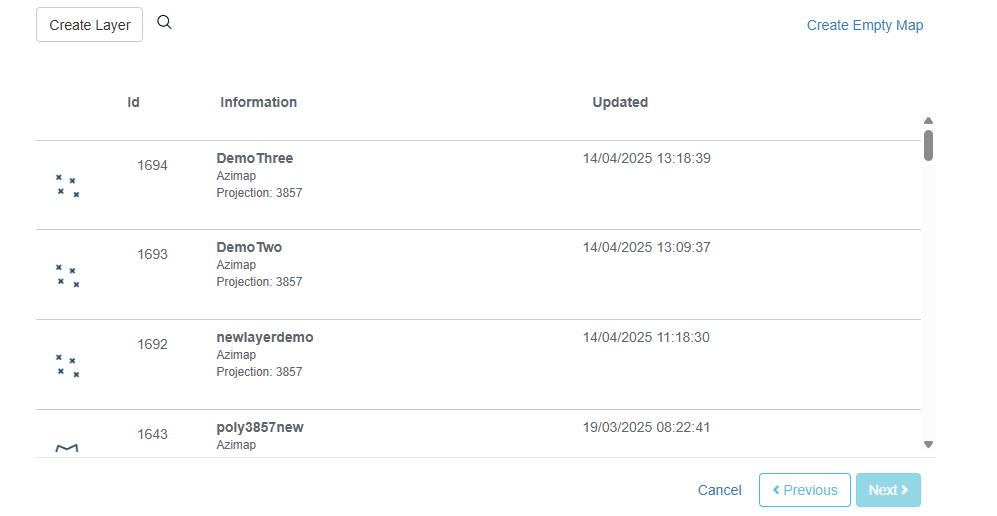
Create new layer and add to the map
The next step in the wizard is to add a layer/dataset to your map.
There are a few options at this stage. You can select CREATE LAYER which will allow you to import a new layer/dataset onto your map. You can also choose an existing layer from the list below. You can also choose to create an empty map.
In this instance, press CREATE LAYER.
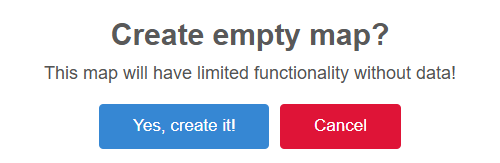
You will get the below pop-up message. Select YES, create it!
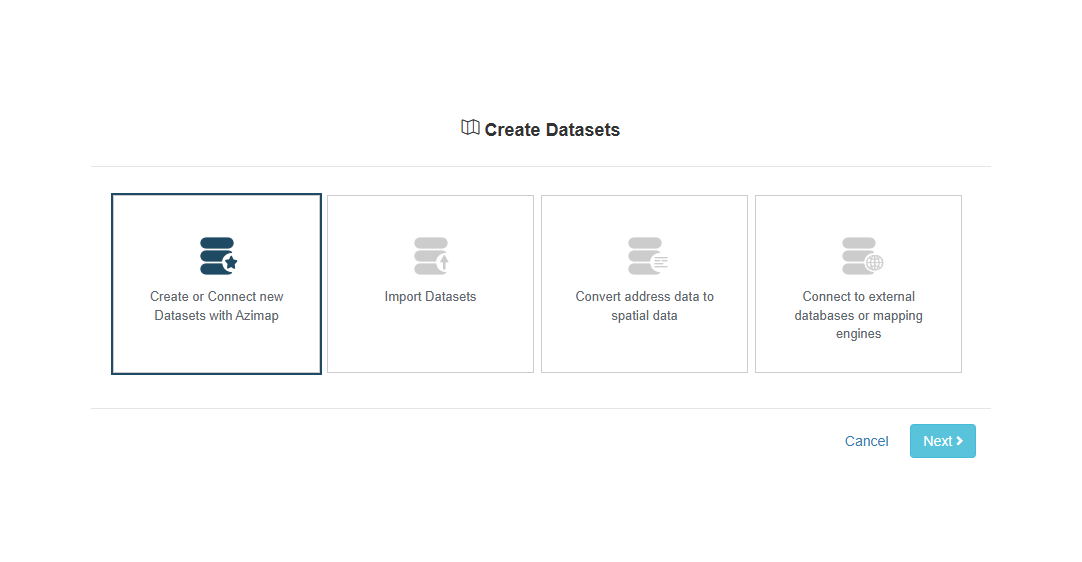
To create a dataset for the map, go back to the Dataset window, click on Create Dataset.

Choose CREATE OR CONNECT NEW DATASETS WITH AZIMAP, then click NEXT.
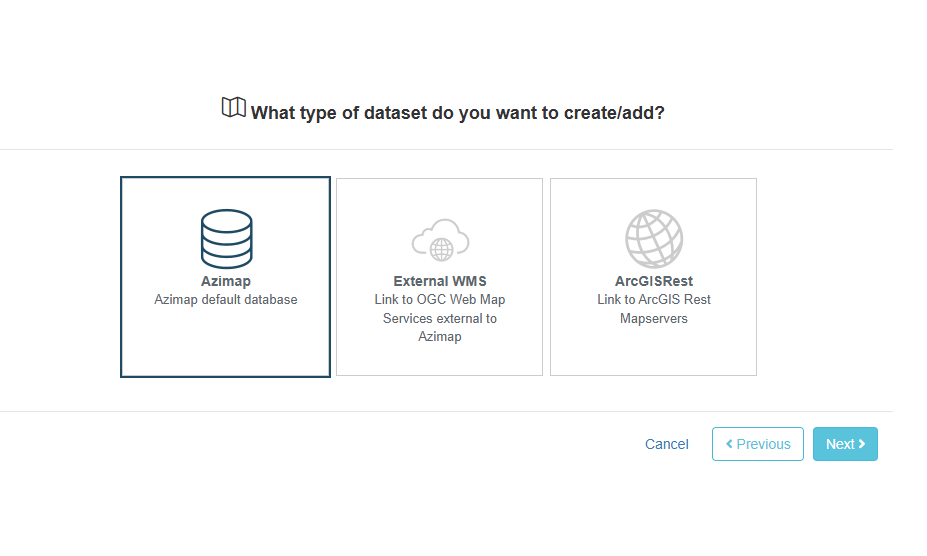
In the next stage, the wizard will ask you 'What type of dataset do you want to create/add?'.
Select the AZIMAP option.
Give your new layer a name - perhaps
'touristlayer'.
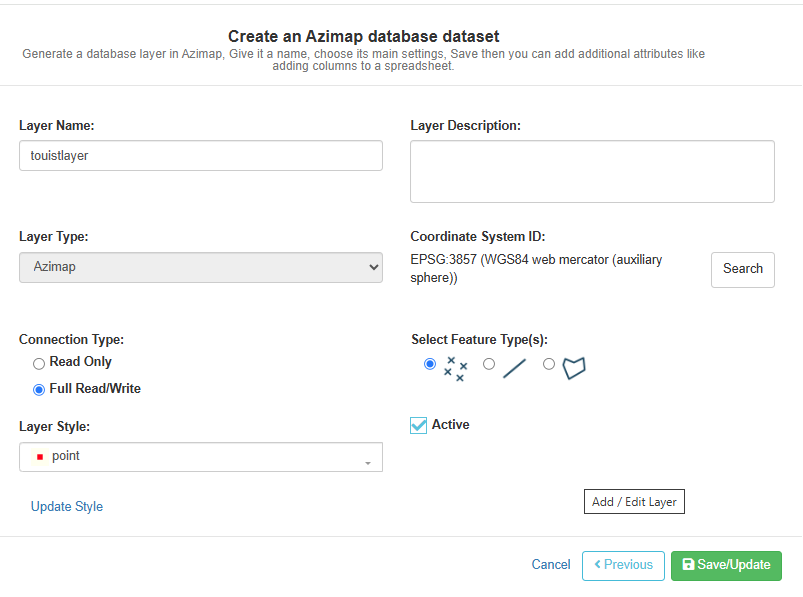
Optional settings are:
- Layer Type (defaults to Azimap DB Layer - allows for connecting External WMS, ArcGIS Cache/ Rest services
- Coordinate System ID - Default is fine, however if you want you can search for your local projection system (British grid for Edinburgh)
- Choose a feature type: Point, line, polygon - default is the point which is correct for this map
- Set map Read Only or Read/ Write - Default Read/Write
- Active - make layer usable on creation - Default true
- Apply default style to the layer - for this tutorial the 'default 'point' style is fine
Click SAVE/UPDATE.

1.3. Add an attribute
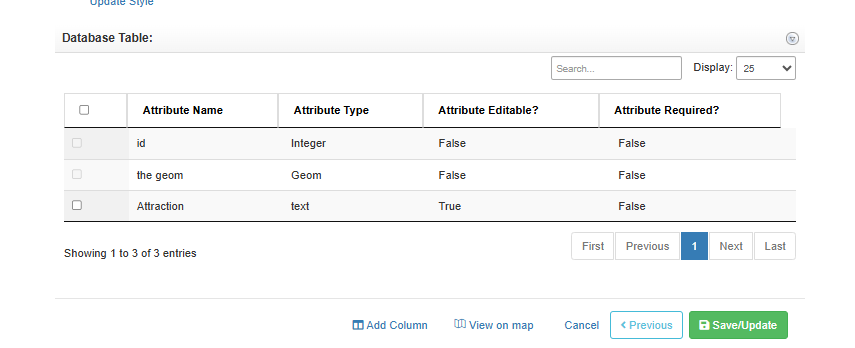
After saving, the ADD COLUMN button
should appear, please click it.
·
Give your attribute a name - 'Attraction' would be appropriate in this
case.
·
Set it to type 'text'.
·
Max length to be left blank.
·
Attribute editable left at default true.
·
Attribute required left at default false (if set to true this will
insist that this field is entered before a user can save a feature).
·
Click ADD to add the new table entry - this will create the new column
in your database table.
·
Click SAVE/UPDATE and close the layer config screen.
2. Configure the popup
On the layer tree view click and select the layer config. option. 
The dropdown includes options for:
- Zoom to current layer

- Add existing layer

- Change map layer config.

- Change layer definition

- Delete layer from map

Click the ADJUST POPUP CONFIG button to edit click hover attributes.
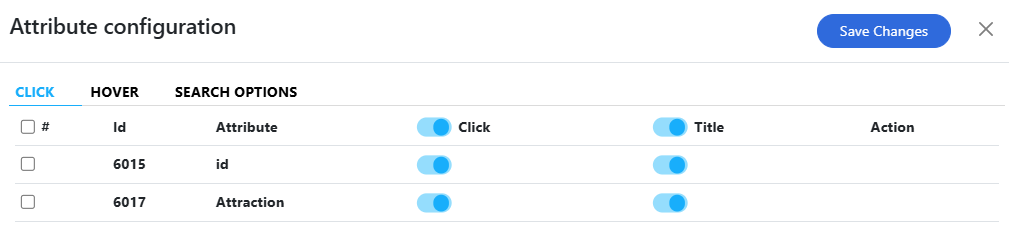
Click SAVE CHANGES.
3. Create your attractions
3.1. Draw your first attraction
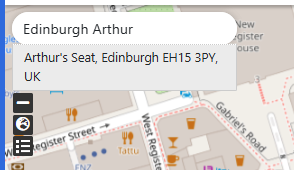
Utilise the search address box in the
top left to find your location, for us its ‘Arthur’s Seat, Edinburgh’.
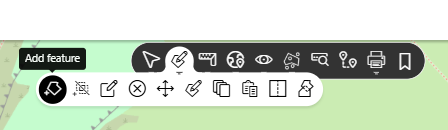
On the toolbar, click on "Add Feature".
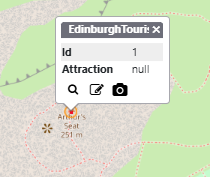
After placing the point, you will be able to click on the feature you ahve just created. You will see it has been given an ID already.
3.2. Attach images to attractions
After you select Arthur’s Seat, click the camera  to attach images.
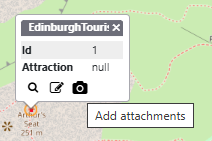
Click OPEN to attach the images (you can use the images from the file you downloaded at the start).
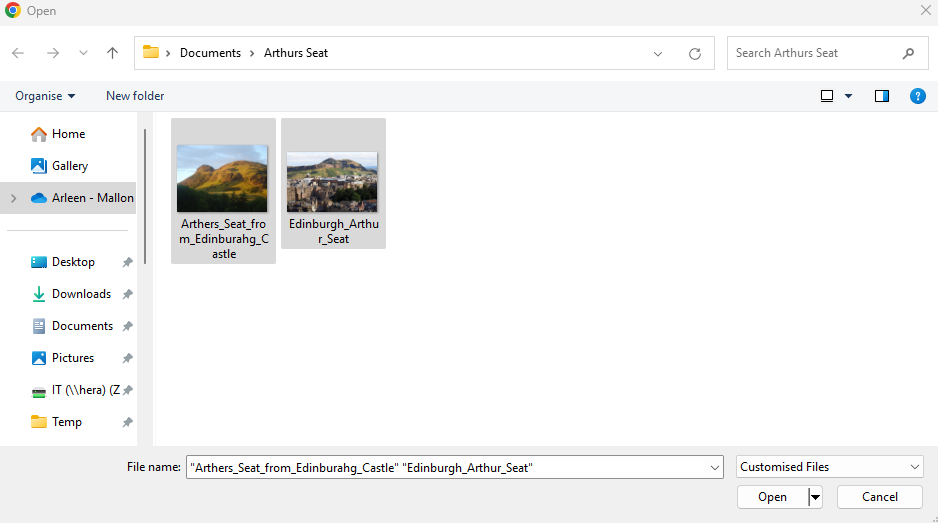
Images can be removed after upload
using the delete button in each image.
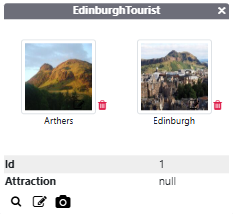
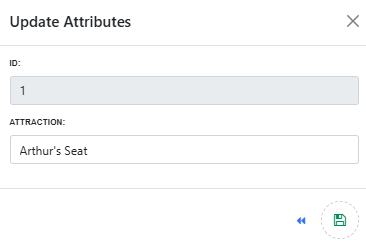
Click on  to edit the attraction we have just added. This is where you can edit the name of the Attraction.
Here we will enter "Arthur's Seat"
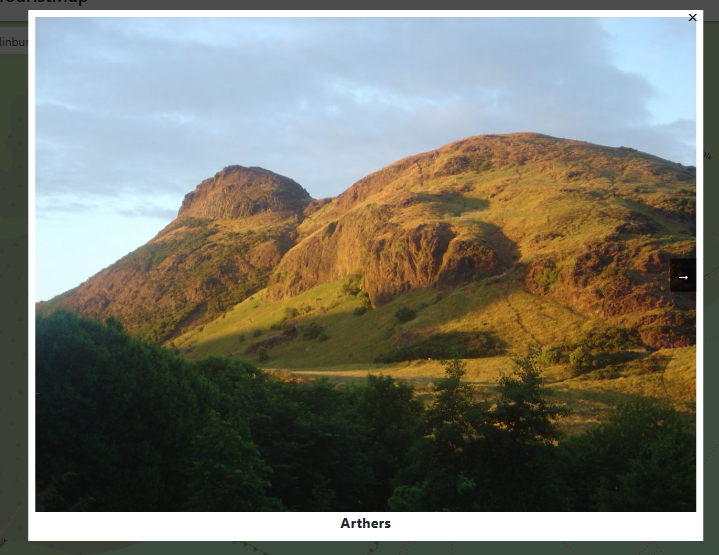
Click on the feature to view the
attached images in the popup.
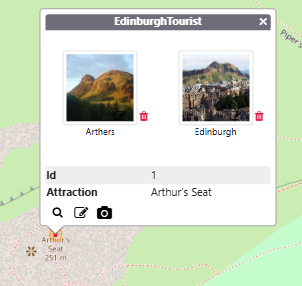
Images can be clicked for a lightbox
view of the images.
3.3. Repeat steps 3.1
and 3.2 for each attraction
Thanks for reading
the guide! Now you can go add some pictures to your maps.
If you haven't
signed up yet go to the Azimap website and click REGISTER.
An example of our
map as created with this tutorial is available at Edinburgh Tourist Map