Click the 'Create dataset' button to start creating a new dataset.
Click the 'Create or Connect' option to proceed with creating a new dataset.
Click Next to proceed.
Click on Azimap.
Enter a Dataset Name.
(optional) Enter a dataset description.
(optional) If you wish to set a custom projection for this dataset, select it from the dropdown.
Search for the projection of your choice and select it e.g. EPSG:27700 (British_National_Grid)
Select the desired Geometry type for your dataset.
By default the dataset will be full Read/Write permissions, this can be changed at any point to be Read Only instead.
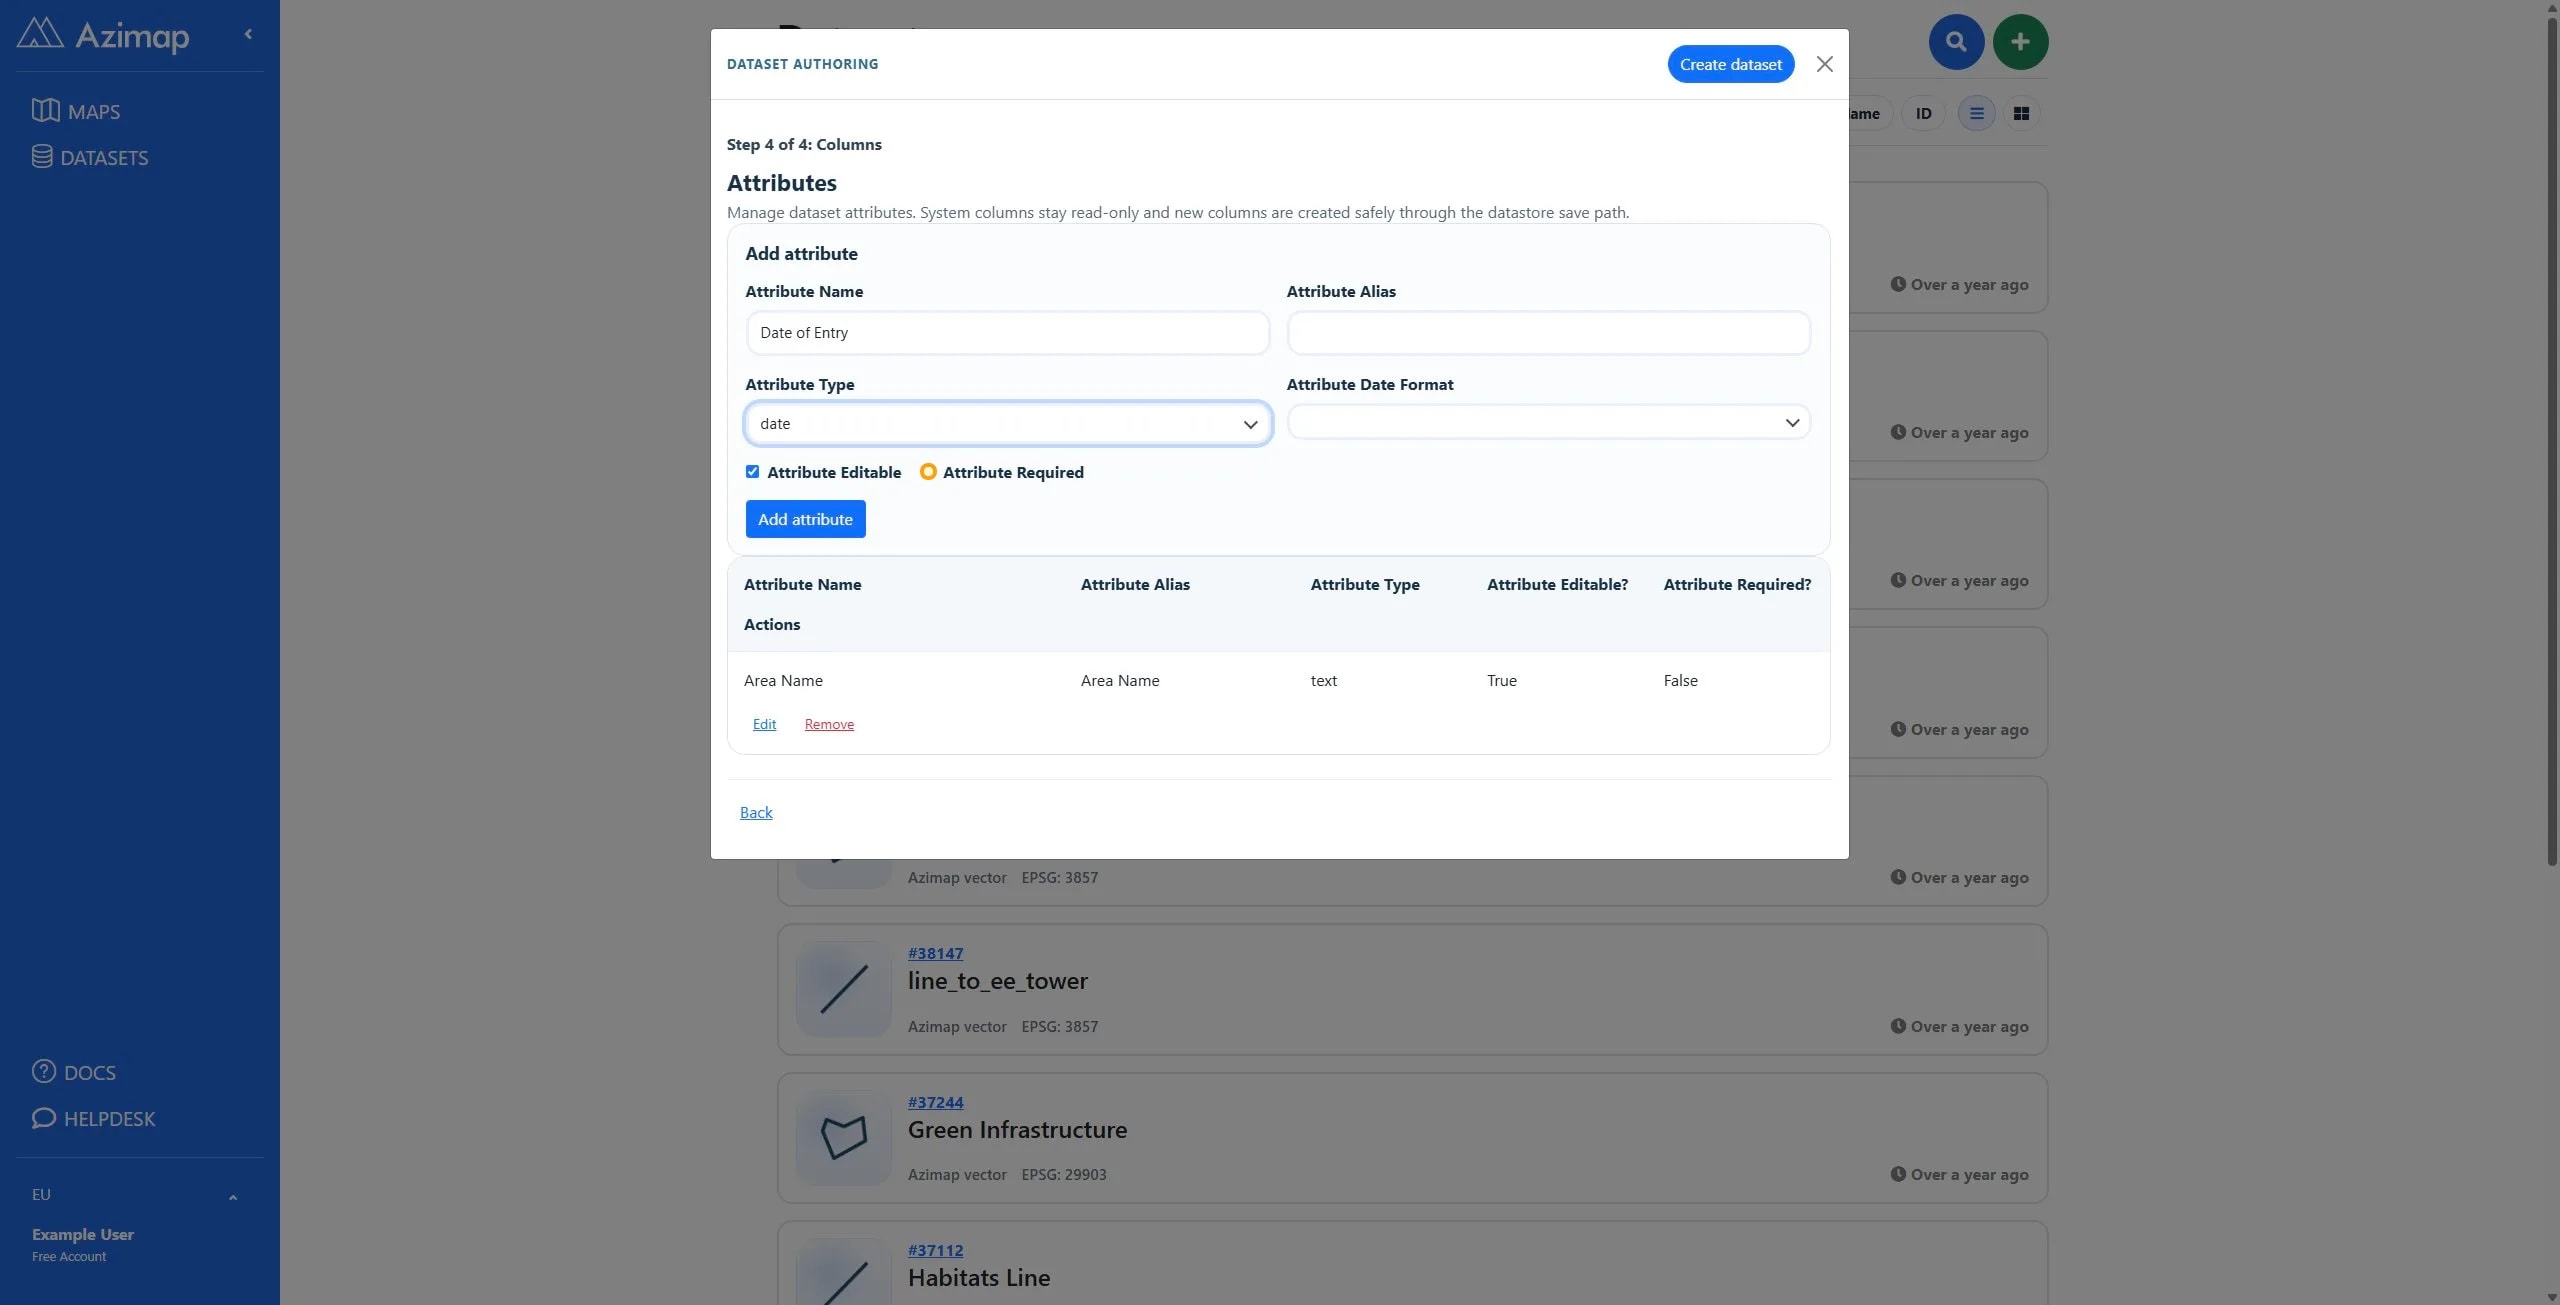
Now add some columns to your dataset. Start by entering your first Attribute (column) name.
At this point you can optionally add an attribute alias which will act as a Display name for the attribute when it appears on a map. You can alos choose the attribute type. Once happy click Add Attribute.
Attribute Alias can be changed at any time and is useful for datasets that have columns with non meaningful names. i.e. a column named "h_reg_date" might be better off with an Alias of "House Registered Date" to make more sense for anyone looking at the data in Azimap.
You can continue adding as many attributes as desired.
Open the attribute type dropdown to see the full list of available data types.
You can set whether or not the Attribute should be editable and if it should be required. A required attribute means when a user creates a new record, this field must not be left empty.
Once you are happy with the attributes click Create Dataset to complete the process.
Now the dataset is created you can choose to open the dataset to begin adding data or click 'Done' to dismiss this popup and return to the datasets page.