This guide will take you through the steps to take to successfully connect an OGC WMS server to Azimap.
Time to complete: 5 mins
Contents
1. Getting started
2. Choosing a layer type
3. Connecting to the WMS
1. Getting started
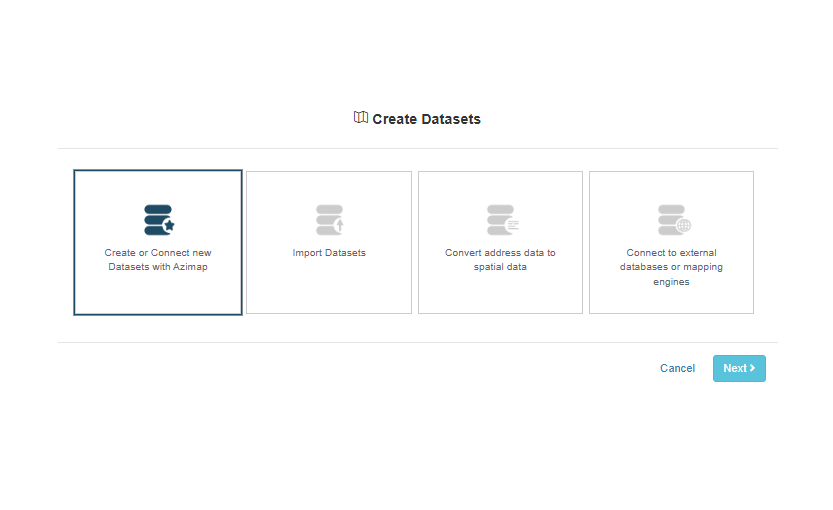
To get started select the CREATE DATASET button either on the DataSets Catalog

Select CREATE OR CONNECT NEW DATASETS WITH AZIMAP on the first stage of the wizard.
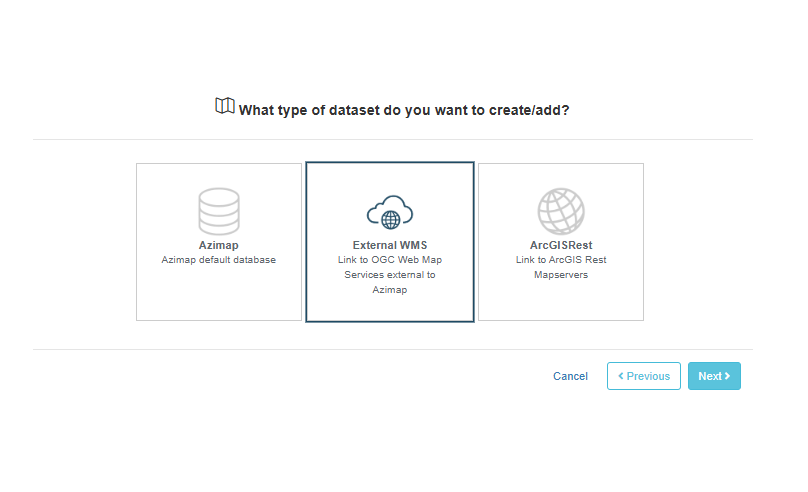
2 Choosing the layer type
At the next stage of the wizard, select the EXTERNAL WMS dataset to create/add.
3 Adding the data
Give the dataset a name and optionally a description
Enter the URL of the WMS service into the WMS url textbox
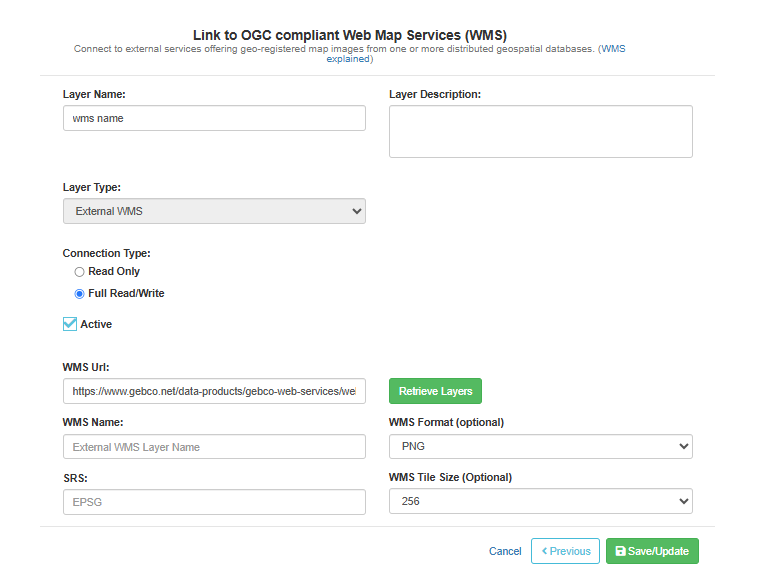
and click RETRIEVE LAYERS to download the list of available layers in the WMS server.

Select a layer using the checkboxes and a supported projection (SRS) and SAVE/UPDATE the layer.
After saving you can create a new map with the layer added by clicking the VIEW ON MAP button.
If you haven't signed up yet go to the Azimap website and click REGISTER.