Adding an Active Directory Group And
Applying Roles
This is an option for users at
Enterprise level of active directory-enabled site-installs only. This option will allow you to add groups and
apply roles in your organisation.
Time to
complete: 5 mins
Contents
1.
Getting started
2.
Creating a group
3.
Managing group roles
1.
Getting started
To
begin, navigate to the ADMIN page, click ACTIVE DIRECTORY
MANAGEMENT and click on the ADD NEW GROUP button. This will
display the NEW GROUP screen.
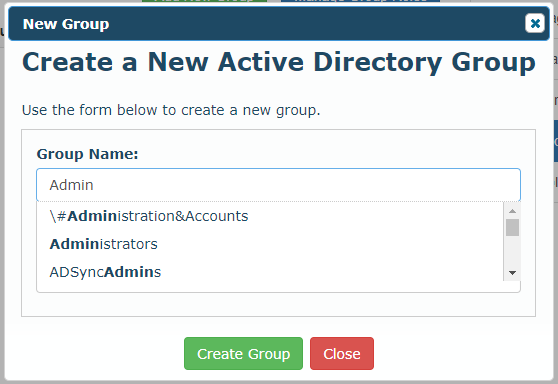
Here
you can start typing in the GROUP NAME field to search for
groups that exist in your Active Directory.

2.
Creating a group
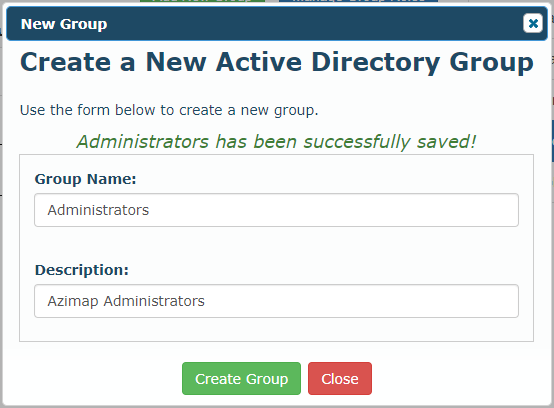
Choose
the group you wish to add from the drop-down list, enter a
description (optional) and click CREATE GROUP.

3.
Managing group roles
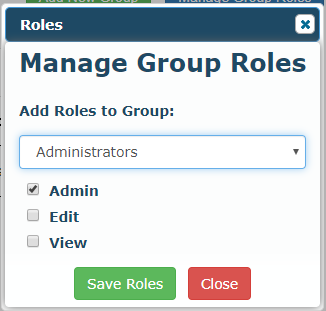
Now
close the NEW GROUP window and click the MANAGE GROUP ROLES button
which will show the MANAGE GROUP ROLES screen.
Select
the group you want to manage from the drop-down list, check/uncheck the desired
roles and click SAVE ROLES to confirm.

Your
new group has now been configured.