Import Your Data Onto a New Layer
This guide will take
you through the steps to take to successfully import your data onto a new
layer, to set on a new or existing map.
Time
to complete: 15 mins
Contents
1. Getting started
2. Choosing
a layer type
3.
Importing your
data/layer
3.1 Preparing your attachment for import
3.1.1 Configuring
your import
3.1.2 Choosing the
EPSG
3.1.3 Re-naming your file
3.1.4 Removing files or layers
3.1.5 Final import of files or layers
3.2 Adding your new layers to a map
3.2.1 Place your new
layer on new map
3.2.2 Place your new
layer on an existing map
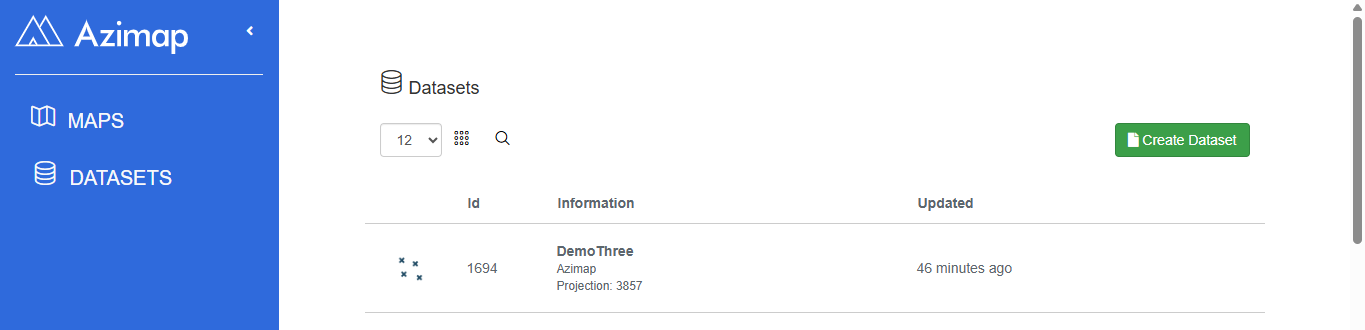
1 Getting started
To get started, click on the CREATE DATASET button
under the DATA CATALOGUE section.
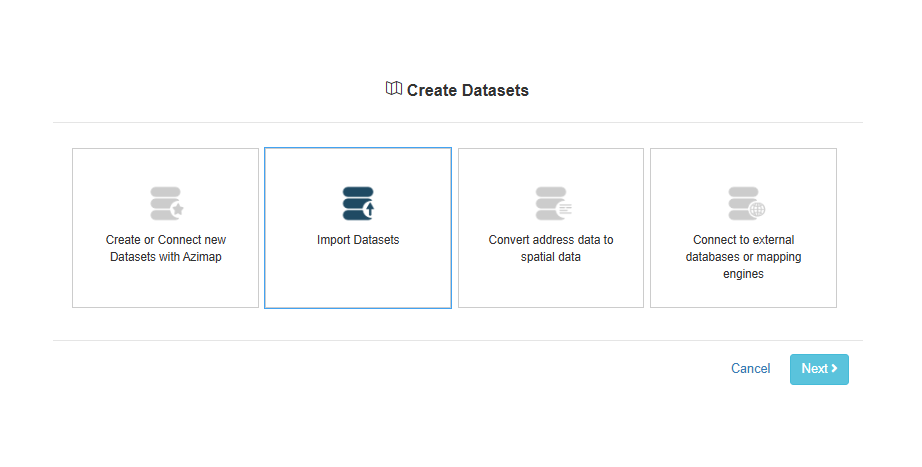
2 Choosing a layer type
This will open the CREATE DATASETS wizard. Select the
layer type that you would like to create and click NEXT to
continue.
Not sure which type of
layer you need to create? It really
depends on the geographical data that you possess. Select:
1. Create or Connect New Datasets With Azimap
Within this option there are a number of sub-options:
Azimap - Allows the user to create data tables
within Azimap
Data Library - The user can connect to curated public
datasets
Layer Groups - Merge multiple Azimap layers of the same
projection into one for display purposes
External WMS - Allows the user to link to OGC Web Map
Services external to Azimap
ArcGIS Rest - Link to ArcGIS Rest map servers
Map
Genie (Cached) - Allows the user
to link to OSi (Ireland) MapGenie Cached tile service (ArcGIS Rest Cached)
Map Genie (Rest) - Allows the user to link to OSi (Ireland)
MapGenie Rest service (ArcGIS Rest)
2. Import Datasets – Choose this option if you have locational information for your data,
such as coordinates or latitudes/longitudes.
3. Convert Address Data to Spatial Data – Pick this option if you have ordinary address information such first
line of address or postcodes.
4. Connect to External Databases or Mapping Engines – Choose this if you want your map to feed from a
live data stream, and your database will be hosted on a SQL server.
3 Importing your
data/layer
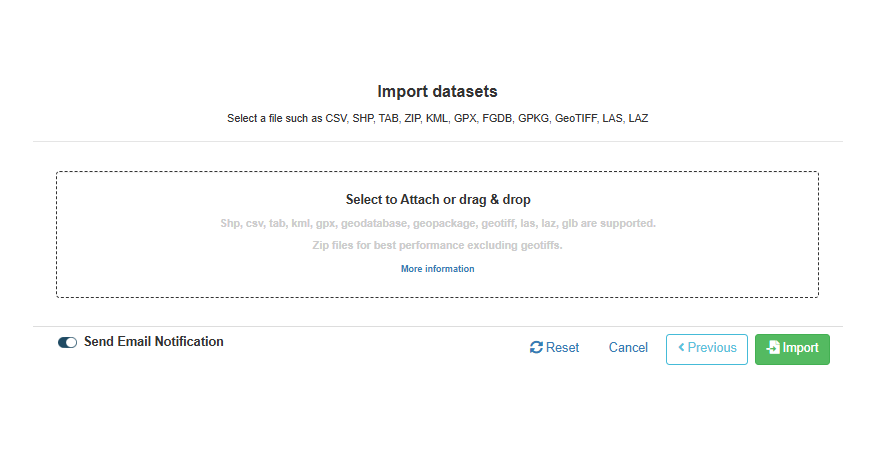
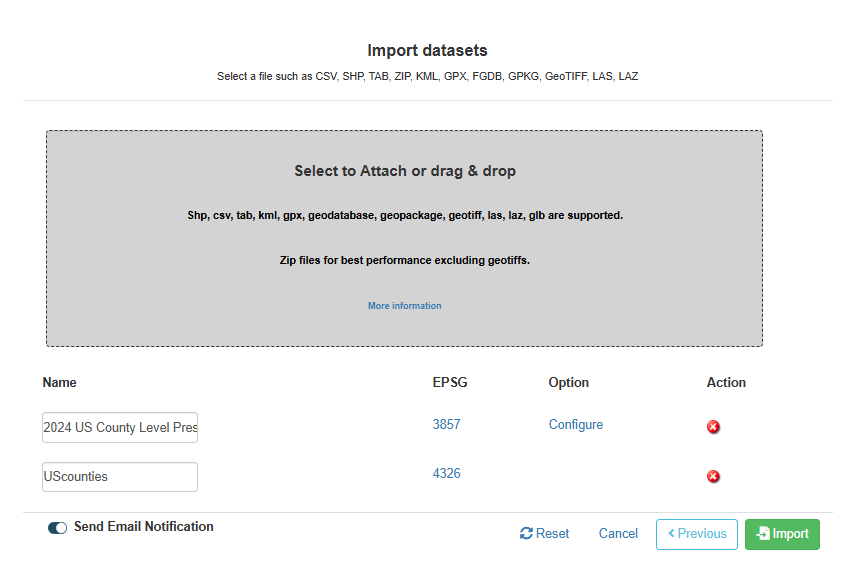
If you select either of the IMPORT DATASETS or CONVERT ADDRESS DATA TO SPATIAL DATA options, the next screen the wizard will bring you to will be one where you can upload your files, as seen below. Files can either be dragged and
dropped into the box or you can click the box and select the file or files you
wish to import using your computer's file browser.
Compatible file types include:
·
Shape files
·
CSV files
·
TAB files
·
KML files
·
GeoTIFF files
Note: It is possible to import multiple files and file
types at any one time. Simply, drag or select all the layers you
wish to import and they will appear one by one in the IMPORT DATASETS window below.
3.1 Preparing your attachment for import
3.1.1 Configuring your import
Does your import need configuration?
When certain file types are imported, such as Shape files, all the processing
of the layer is handled automatically by Azimap with no configuration
required. This can be seen in the example below.
However, certain file types, such as KML or TAB files, may require some
additional configuration before they can be imported. As seen below, when
a file is imported that requires configuration, under OPTION you
will notice a new button, CONFIGURE.
Choosing the correct ‘Feature Type’
If you click on the CONFIGURE button, a pop-up window
will open. This will ask you to select the FEATURE TYPE for
the Layer(s) you are importing.
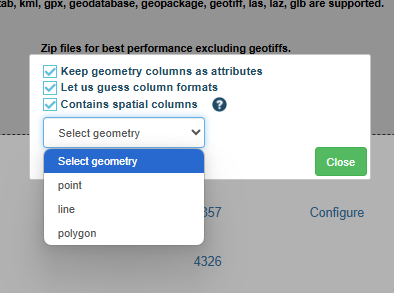
When to choose a point, a line or a polygon?
Point – Choose this option if you want your data
represented as a single point on a map, e.g. no. of new cars by location.
Line – Line data is used to represent linear features
such as rivers, trails, or streets.
Polygon – Polygons are used to represent boundaries, for
example cities or counties.
Once you have selected the FEATURE TYPE, click the CLOSE button
to confirm the change.
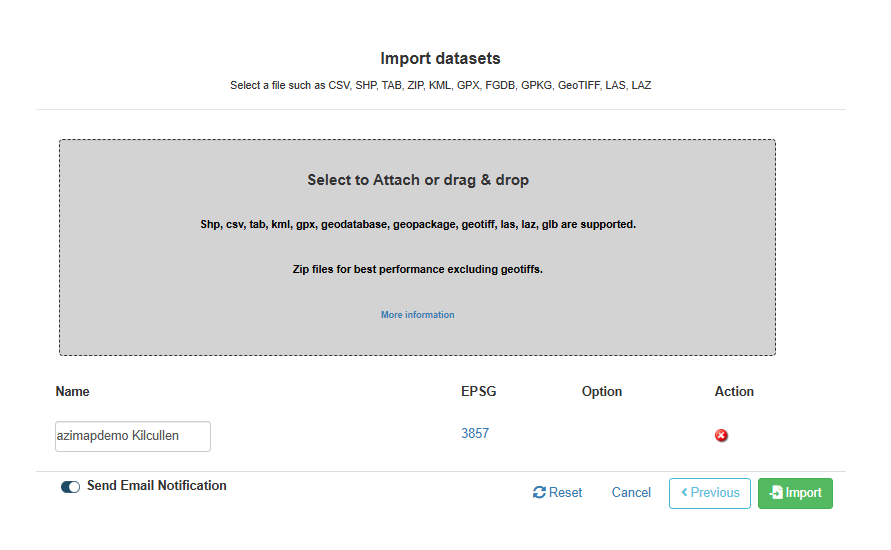
3.1.2 Choosing the EPSG
When uploading files into Azimap, it’s possible (and may even be
necessary) to alter the Map Display Projection/EPSG before
importing your layer(s). In some situations, Azimap isn’t
able to detect the EPSG for your data and you’ll need to enter it
manually.
To do this, you need to click on the EPSG next to the name of
the layer you wish to alter. This will open a new pop-up
window. To search for a new EPSG/Map Display Projection, you
simply need to enter the projection number into the search box and select the
correct projection from the drop-down list. This will confirm the change.
N.B. Once imported,
it will not be possible to change the Map Display
Projection/EPSG for
your layer.
If you’re unsure which projection to enter, some of the more common
projections you could try are:
·
EPSG:4326 - WGS 84,
latitude/longitude coordinate system based on the Earth's centre of mass, used
by the Global Positioning System among others.
·
EPSG:3857 - Web Mercator projection used for display by many web-based mapping tools, including Google
Maps and OpenStreetMap.
·
EPSG: 27700 - UK projected co-ordinate system.
3.1.3 Re-naming your file
The name of any files you upload to Azimap can also be changed before
they’re imported. To do this, you need to click in the NAME box and type
in a new name for the layer you would like to import.
Any name changes you make will appear in the data catalogue once
the layer has been imported.
3.1.4 Removing files or layers
If you upload the wrong file into the IMPORT LAYER window,
you can remove it before importing by clicking on the X button
under ACTIONS next to the layer you wish to delete. Alternatively,
if you wish to remove all the layers you have uploaded into
the LAYER IMPORT window, simply click on the RESET button
to remove all the layers.
3.1.5 Final import of files or
layers
When you’re happy with the configuration of your layer(s),
press the IMPORT button. This will start the conversion
process to turn the files into usable layers.
3.2 Adding your new layers to a map
Once the conversion process is complete, you will be presented with the
pop-up below. You can now choose from two options for your imported layer:
3.2.1
Place your new layer on new
map

To place a layer on
a new map, simply enter a name for the new map you
wish to create and click the YES button. This will take
you straight to your new map with your imported layer(s) visible
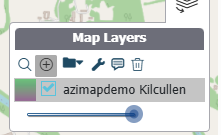
on it. Your imported layer(s) will now appear in
the Layer Portal and your new map will appear
in the Map Portal.
3.2.2 Place your new layer on an existing map
If you wish to just import
you layer(s) and not place them on a new map,
simply click the NO button. This will close the pop-up
and your imported layer(s) will now appear in the Layer
Portal.
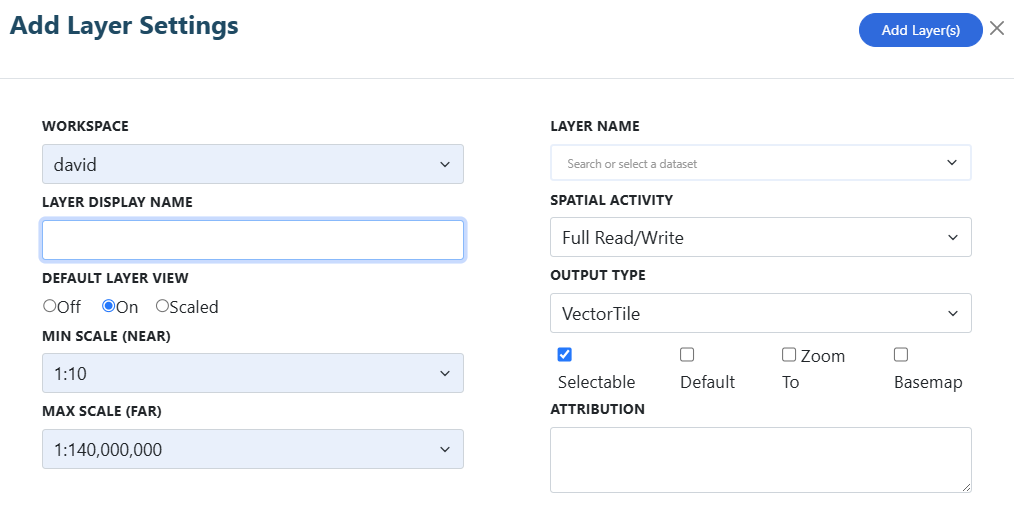
You will now be able to
place your imported layer(s) on to any of your existing Maps.
For further information on
how to do this, please refer to the Select Map Layers section of the user guide.
If you haven't signed up yet go to the Azimap website and
click REGISTER.